There are a lot of things you can do with a tarp. Now, a CAMO tarp inspires a hunter in a variety of ways. One of those inspirations is building a semi-permanent, yet portable ground blind.
There’s no doubt that hunting from a ground blind is an effective, comfortable and versatile option for hunters of all ages and experience levels. There are some really innovative and user-friendly options on the market, but they can be hard on the wallet. While a DIY ground blind may not be as streamlined as those manufactured blinds, it is an affordable option that also stretches those creative muscles.
Here is a ground blind blueprint that will serve its purpose in the field and provide an option that can still be moved around to other hunting locations like those portable ground blinds on the market.
Mossy Oak's Cuz Strickland shows us how to build one in about 60 minutes for low cost of about $120 from your nearest Home Depot. This DIY blind project is affordable, simple, sturdy and makes for a fun undertaking for the family.
Here's what you'll need:
Materials
- 4 - 2x6x8' pressure-treated lumber
- 5 - 2x4x8' pressure-treated lumber
- 2 - 4x16' cattle panels
- 1 - box 3-inch deck screws
- 1 - box 1-inch fence staples
- 1 - box staples for staple gun
- 1 - bag of large, black zip ties
- 1 - large roll of black plastic sheeting
- 2 - Mossy Oak camo tarps
Tools
- Circular saw
- Cordless drill
- Staple gun
- Bolt cutters or heavy-duty wire cutters
- Carpenter square
- Hammer
- Tape Measure
- Sharp knife
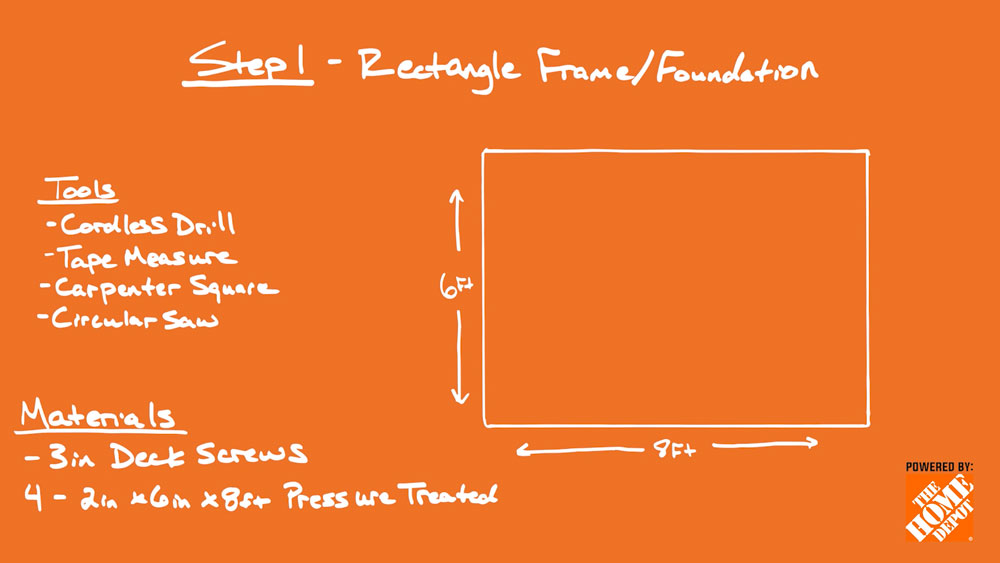
Step 1: Build the Frame Foundation
Using pressure-treated lumber, build the frame of the blind. This particlular blind is 6'x8'. You will need a cordless drill, tape measure, carpenter's square and a circular saw. With 4 pieces of 2x4x8 pre-treated wood, measure twice and cut once, to form the base of the ground blind. Then screw together with 3-inch screws.
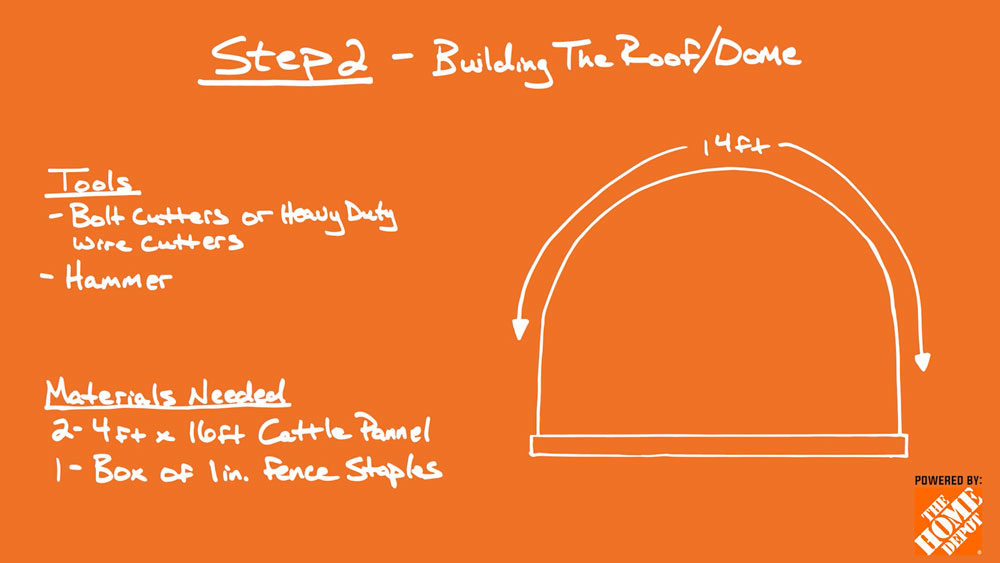
Step 2: Build the the Roof/Dome
Cattle panels make a great options for the sides and roof of the blind, because they can be bent to create that dome or hay bale shape. The panels are also sturdy enough to fully support the weight of the camo tarp and black lining. Use bolt cutters to cut the panels to size and then hammer the panels into the wooden base.
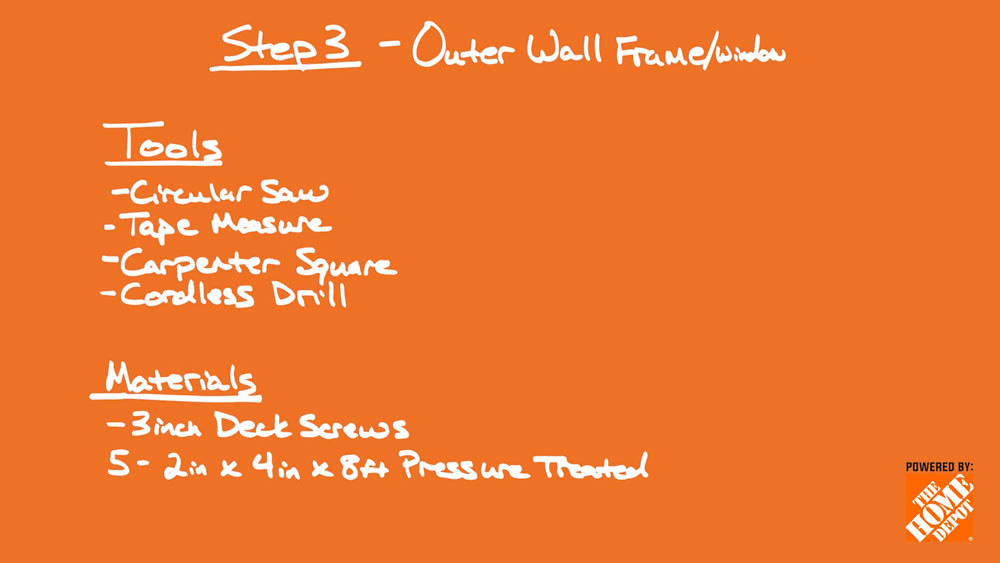
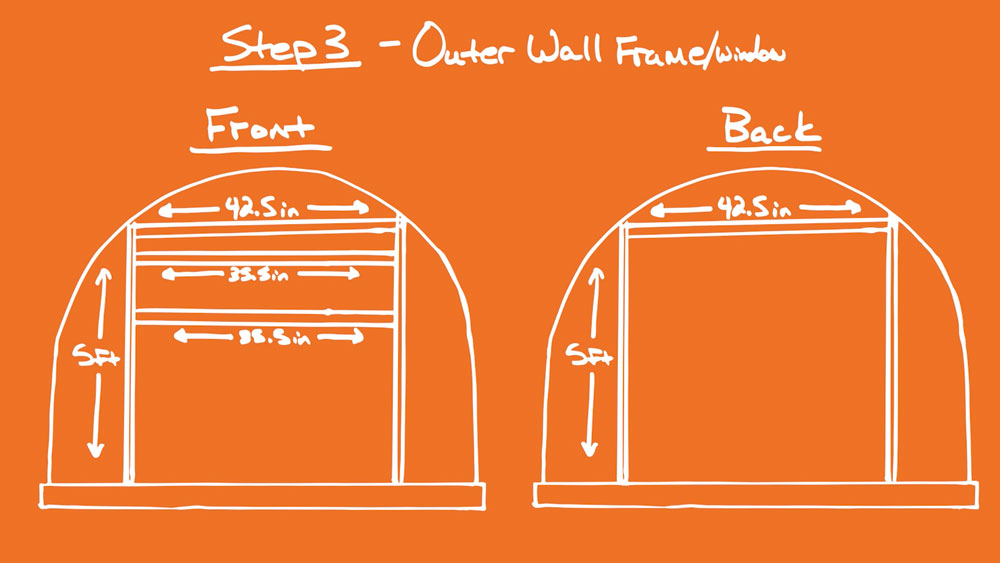
Step 3: Outer Wall Frame/Window
To keep the blind's shape and to reinforce the frame for sturdiness, you'll need to build a wall or frame in the front and back of the blind. One wall will be the door location. The other wall will be the location of the windows. This particular blueprint includes two windows: one for the hunter and one for the guide or a camera person.
Step 4: Wrap the Blind
When your structure is complete, you'll need to cover the blind for camouflaging and shelter. First, line the blind with black plastic sheeting, stapling it to the base and frames and securing where needed with black zip ties. Ground blinds should be dark on the inside to better conceal the hunter. Then, wrap the blind with the camo tarps. Once fully wrapped, you'll need to cut out a flap in the back for the door and cut out a flap for the windows. Do not completely remove the flap. You'll need to be able to roll them up and down to keep you covered. Be sure to add an option for tying down the flaps.
The finished blind is sturdy, but still easy to move to your desired hunting location. Visit Home Depot, pick up your camo tarp and materials, and make an affordable and portable ground blind for hunting and filming.