DJ Randolph | Mossy Oak ProStaff
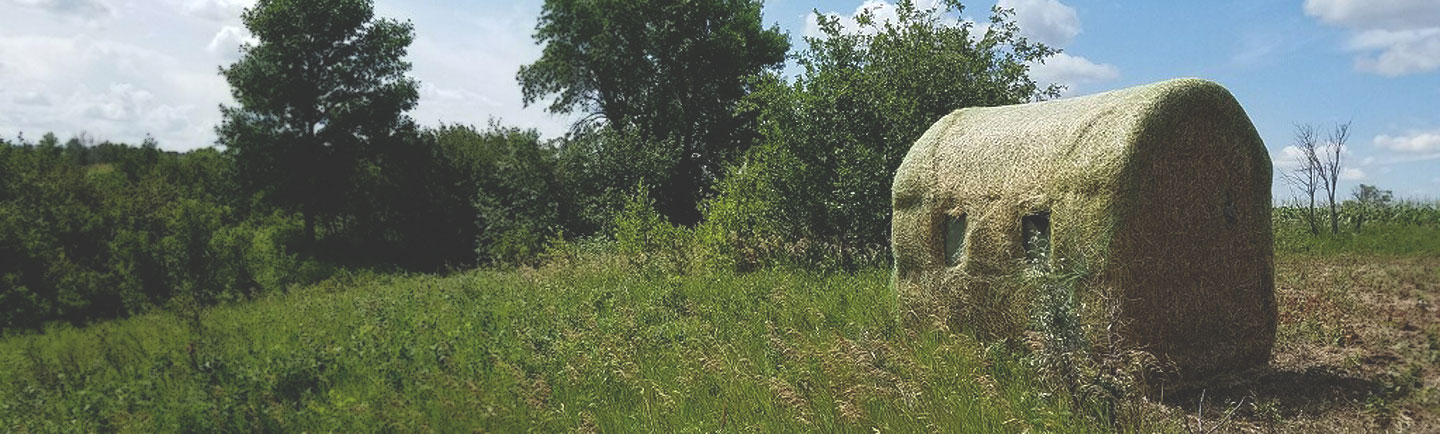
There are a lot of bale blinds available for purchase, but with a little ingenuity, you can build a custom blind that will cost less and better suit your needs and hunting style.
Bale blinds have become very popular in farm country for many reasons:
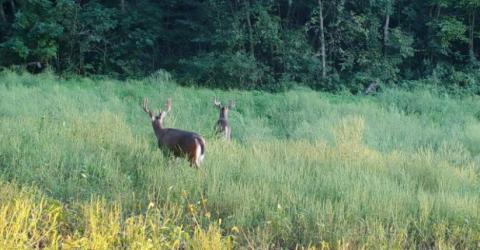
- Wildlife adapt to them faster than they do pop-up blinds. Wildlife in farm country are accustomed to hay and straw bales. A well-made bale blind looks like just another bale in the field.
- Bale blinds will stand up to harsh weather conditions better than most pop-up blinds do. In open country, blinds have to stand up to weeks of wind, rain, snow and long hours of sunlight. A well-made bale blind will hold up through multiple seasons of harsh conditions.
- Bale blinds protect the hunter from the elements. A good bale blind offers better protection from rain and wind than pop-up blinds do.
- Bale blinds are easier to hide from other hunters. From a distance, your blind will look like any other bale to other hunters.
I have seen a great variety in the design of bale blinds. It all comes down to your budget, construction skills, how long you need it to last and materials that you have available to you. I will go over a very basic design that is economical to build, requires marginal construction skills, should last 3-4 years in the field and is built from readily available materials. All materials are available at home improvement stores except for the straw blanket and bale wrap. I’ll then show you some pictures of more elaborate designs. My advice is start out with one basic blind and go from there.
Materials:
- 3 - sheets ½ plywood
- 4 – 2x4x8’ treated
- 9 – 2x4x8’
- 8 - 4in rough pine boards
- 8 mil black plastic
- 10 small hinges for windows
- 1 – 36” piano hinge for door
- .5 inch fence staples
- 18 feet of 6-foot welded wire fencing
- Paint
- 9/16” staples & staple gun
- 1.25 inch course drywall screws
- 1 inch course drywall screws
- 26 - 3.5 inch power lag screws
- 110’x8’ Straw, double woven blanket. Available from businesses that sell for reclamation work. I purchased from a company named Brock White.
- Bale wrap. I got bale wrap from a friend. Chicken wire is actually a better choice for durability but adds a little weight and cost.
Tools:
- Drill
- Impact Driver
- Circular Saw
- Jig Saw
- Staple gun
- Wire cutters
This blind will be 64” wide by 72” long with a 78” center height. If you plan to bow hunt out of your bale blind, 60” is about the minimum width to draw a bow and have easy mobility. It will take 2 people around 4 hours to build this blind. Our cost for this blind was around $250. This design will fit into most pickup boxes.
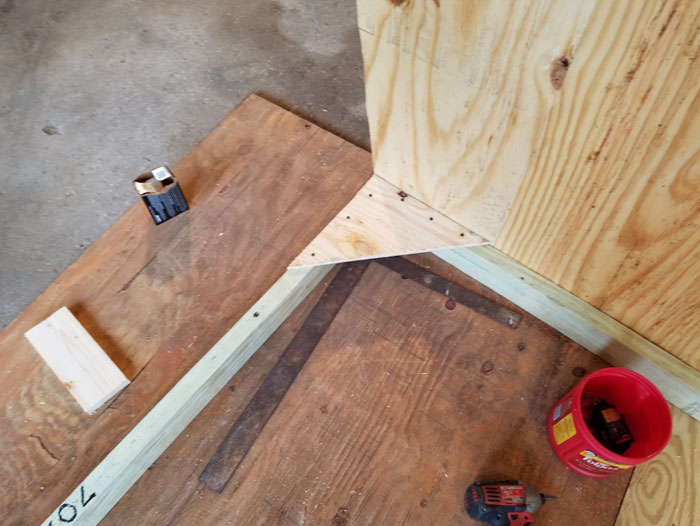
1. The base is made from treated 2x4 and screwed together with power lags. I don’t put a floor in my blinds. Floors add weight and eventually become noisy.
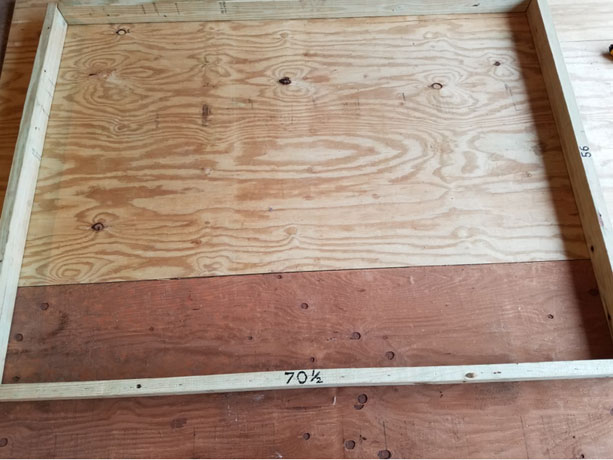
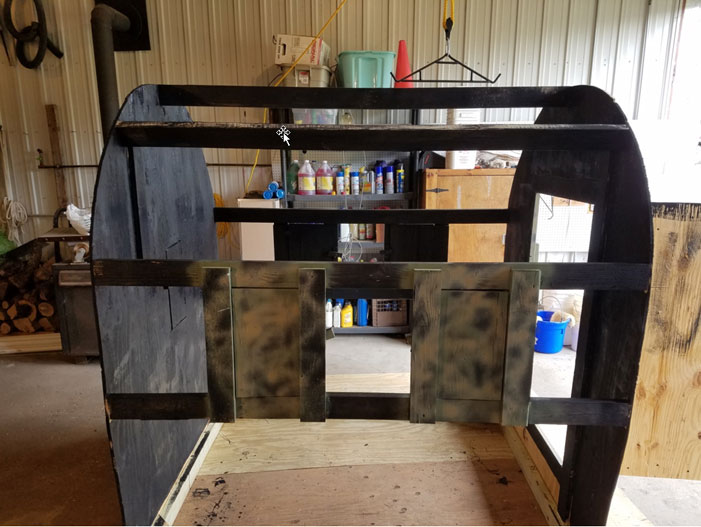
2. It takes 1.5 sheets of plywood to make each end. We are building this blind for bowhunting so that determined the height and placement of the windows.
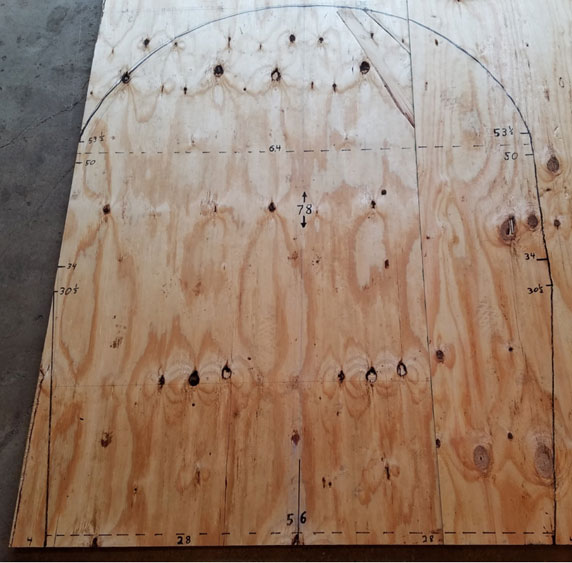
3. 2x4s are used for the side and top supports. The 2x4 on the sides will be part of the window frames.
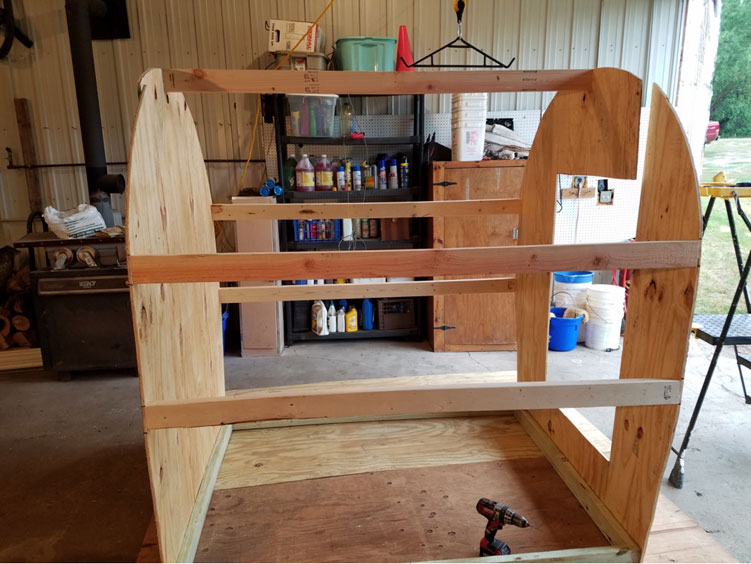
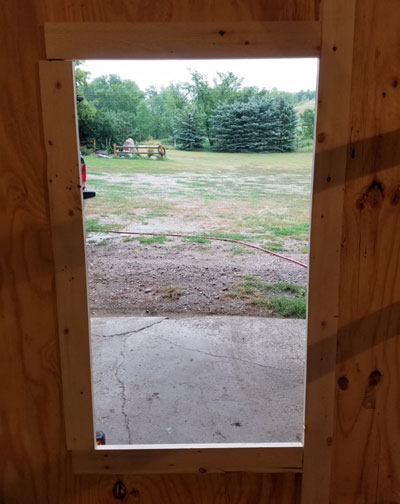
4. 4-inch pine boards are used for the window framing. Windows are made from remaining plywood. Our windows are 9” wide by 16” tall.
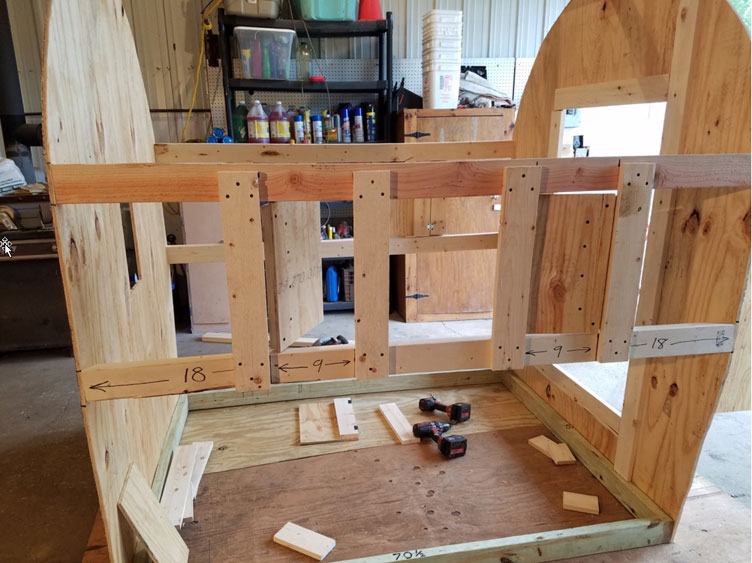
5. Take time when framing out your windows and keep in mind that wood will shrink and swell with environmental conditions. A tight fitting window at construction time can become sticky and noisy in the field. I like 1/8” to 1/4" spacing around my windows.
6. My door is 28” wide by 48” high. Our door is raised 10” off the ground. This is an important lesson after a few mistakes. If the blind is in tall grass or in the northern deep snow, it can become blocked if it is at ground level. Snow and ice build-up can prevent your door from opening.
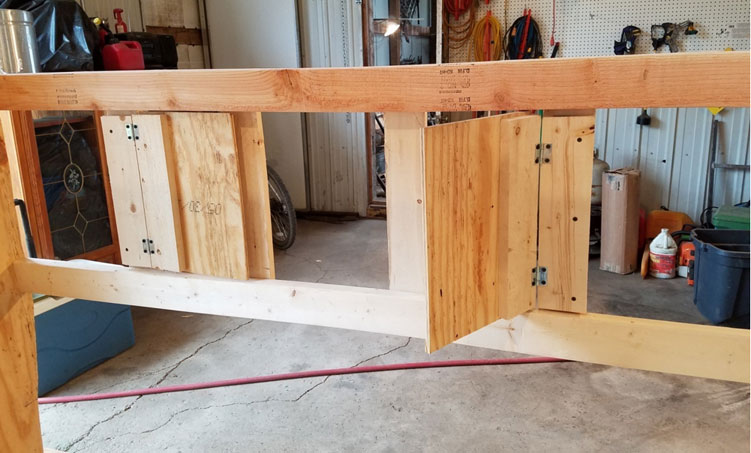
7. I like simple wooden closures for the doors and windows. Metal latches tend to be noisy and don’t seal as well.
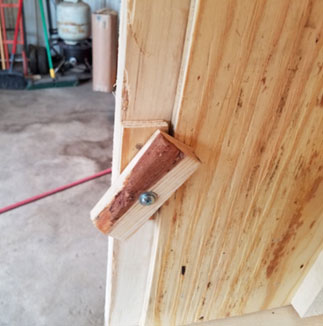
8. Corner braces help to offer stability and make nice little shelves.
9. Once all wood work is complete, we paint everything inside the blind black or a dark color.
10. The 6-foot welded wire is attached with ½-inch staples. The windows are then cut out.
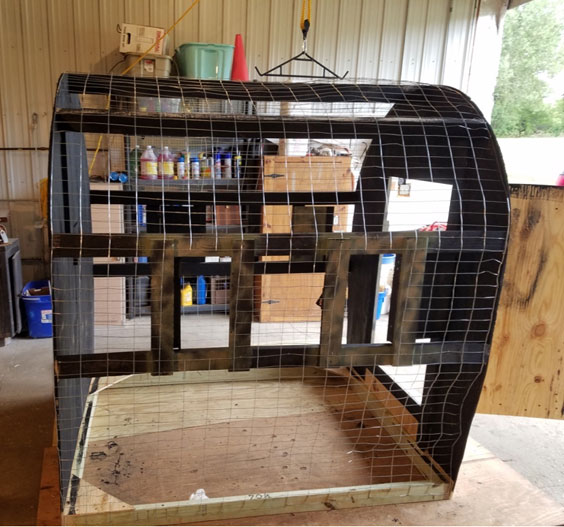
11. Black plastic is put on the ends first and then rolled over the top. You just need enough staples to keep it in place. You will be using a lot more staples for the straw and wrap. (If you want a longer lasting blind, heavy tarp can be used.)
12. We use 3 layers of straw to get good coverage. We cover the ends first and then roll over the top. You just need enough staples to keep it in place. You will be using a lot more staples for the wrap.
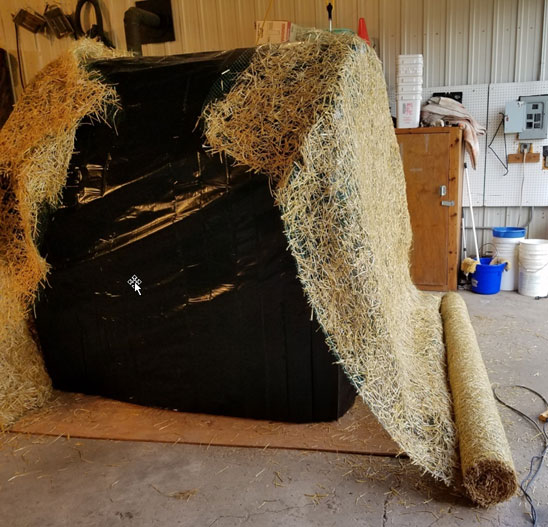
13. We repeat this process with the wrap or chicken wire. At his point use a lot of staples, especially on the corners and around the windows and door.
14. The next step is to cut out the windows and door and you are done. Make sure to staple well around all openings.
15. Your blind is now ready to go to the field.
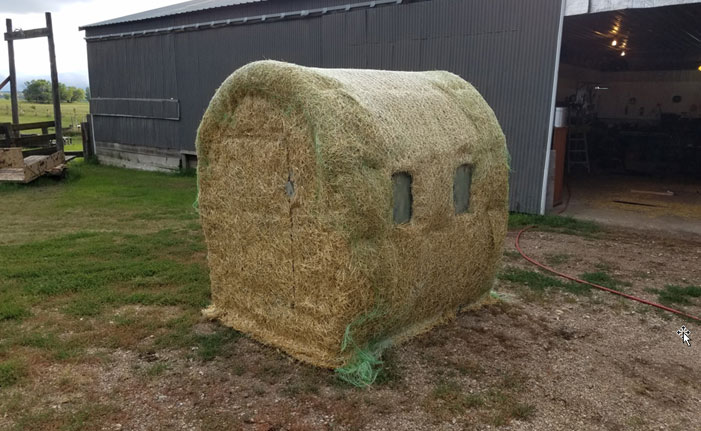
This blind was built 5 years ago and just had new straw put on it this spring. This is a semi-permanent installation and I take kids hunting here, so I spent extra time and money to make it bigger and last longer. This blind is 6’x7’. It has wooden sides with more windows, a heavy brown tarp instead of black plastic and chicken wire for the outside wrap. This blind would cost in the $450 range.
Disclaimer:
- If hauling long distance it is a good idea to wrap it in a tarp to prevent wind damage while driving.
- If your blind will be in an open area, it should be staked down. It may seem heavy but I have chased one across a stubble field on a very nasty day. I usually use a couple of small metal fence stakes and some rope.
DIY projects are very fulfilling. I always enjoy hunting out of a blind or shooting house that I made. I hope that this method of hunting is as effective for you as it has proven to be for me.