Jarrod E. Stephens | Originally published in GameKeepers: Farming for Wildlife Magazine. To subscribe, click here.
Many outdoorsmen have fond memories of spending time beneath the apple trees at a family member's home. Not only were the apple trees a huge draw for the kids, but they also attracted deer and other wildlife to enjoy the seasonal fruit that fell to the ground as autumn neared. The universal attraction of fruit trees makes them natural candidates for an addition to your landscaping. If fruit trees are in your plans, you can create your own for a fraction of the price by grafting.
Tree grafting is a procedure that involves taking a piece of an existing tree (scion) and attaching it to a receptive rootstock to form a new tree. Grafting apple trees won’t have an immediate impact. However, grafting can improve wildlife feeding options for many years to come. It's important to know what fruit trees thrive in your geographical region. For example, the grafting process won't produce exotic fruit that doesn't typically grow in your part of the country. The following steps can give you, your family and the local wildlife fruit to enjoy for generations.
Step 1: Gathering Grafting Tools and Supplies
Having the right tools and rootstock variety is critical to achieving success with your grafts. If you've decided to graft apple trees, you'll need rootstock for apple trees. Similarly, you'll need pear rootstock if you are grafting pear trees. You can graft other types of fruit trees such as persimmon or cherry trees according to your preference. The best way to get rootstock that is well-suited for your region is to contact your local Extension agent. They will likely be able to get the rootstock for you or help you find a reputable vendor. NativNurseries offers excellent crabapple, persimmon and pear rootstocks.
You'll need a sharp pair of pruning shears to make clean cuts when removing the part of the tree you intend to graft, also known as the "scion." You will also need a razor-sharp knife to trim the scion and rootstock. Crafting knives like the Exacto knife can be used as well. Grafting tape and grafting sealant are critical supplies as you will need to use them to join the scion and the rootstock together and hold them in place. Your local plant nursery has everything you'll need. Be sure to gather all of your required supplies before you start.
Step 2: Choosing the Right Trees to Graft
Choosing the right trees to graft is one of the easiest steps. Think of times when you were driving around and you noticed deer in your neighbor’s yard enjoying the falling apples. The trees that are best-suited for your region are already growing in nature and attracting wildlife with their fruit. Therefore, grafting fruit trees step by step in varieties that are already native to your region will draw deer to your property.
Once you decide which types of fruit trees you'd like to graft, ask your friends and neighbors for cuttings (scions) from their trees — especially if they have healthy trees that draw deer when they drop fruit. Don’t settle for one type of tree. Instead, graft as many different varieties as possible. Some trees graft easier than others, so you may need to experiment with several types. Remember — the grafting process gets easier as you gain experience by grafting more trees.
To offer more feeding opportunities to wildlife, you should also consider grafting trees that will bear fruit during different months of the year. For example, you can graft apples in early June that will drop their fruit during midsummer. You can also graft hardy varieties that will begin dropping their fruit in late August, September and October. When you graft trees that will drop fruit over the course of several months, deer and other wildlife will benefit, even when other food sources dry up.
Step 3: Choosing the Best Time to Graft Fruit Trees
It’s never too early to start planning to graft fruit trees. Late winter into early summer is the best time to do your grafting procedures. Specific timing will largely depend on the type of grafting you're doing. You should gather your rootstock and collect your scion before the sap rises and buds begin to emerge. To choose the best scion, avoid collecting water sprouts that grow from the base of the tree. Instead, collect hardy pieces from the branches. Each piece should have four to six buds and ideally be 10 to 12 inches long. The scion should also match the length of the diameter of the rootstock as closely as possible.
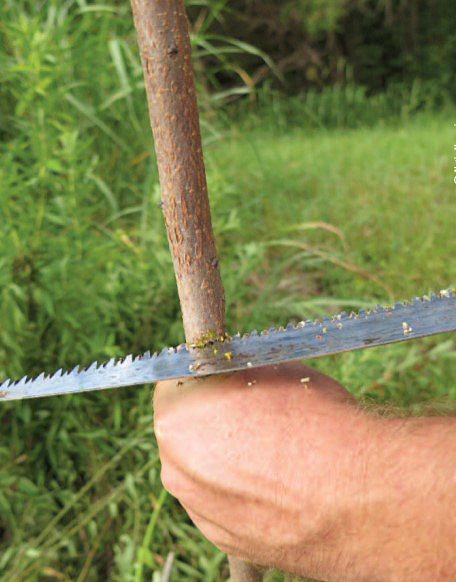
Step 4: Harvesting the Scion
When collecting your scion, make clean cuts with your pruning shears. Placing the harvested pieces in a bucket of water will prevent them from drying out. Be sure to keep water on hand throughout the grafting process. If the scion gets too dry, you may not have a successful graft. There are multiple fruit tree grafting techniques. The photos show two methods. The method shown in the photos in Step 4 and 5 is called the “modified cleft graft.” In Steps 6 through 8, you will see a method known as "bark grafting" depicted.
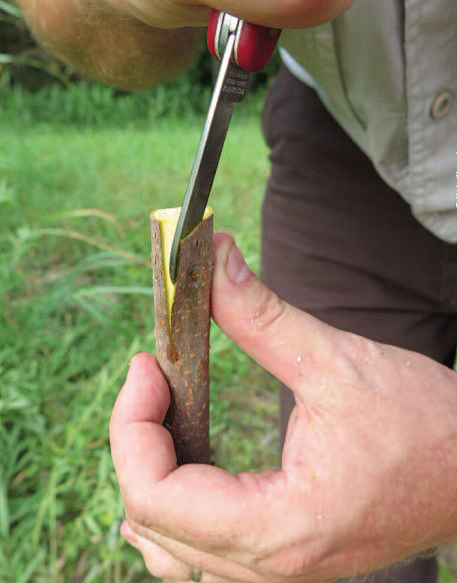
Step 5: The Modified Cleft Graft
The outer layer of the scion and rootstock is referred to as the cambium layer. Through this layer, the nutrients and water are fed throughout the tree. The cambium layer is also where you should join the scion and the rootstock. For a successful grafting, the cambium layer of each piece should touch as closely as possible. This is true for either method of grafting. For successful grafting to take place, the vascular cambium tissues of the stock and scion must be placed in contact with each other.
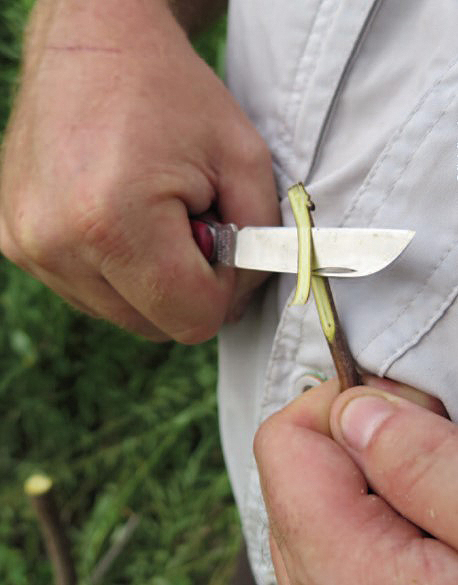
For best results when using the modified cleft graft, choose a rootstock and a scion that are close in size. Cut the rootstock with a sharp pair of pruning shears about three inches from where the ground line will be on the tree. Carefully split the rootstock down the middle about 1-½ inches. Cut the scion into a wedge that comes to a blunt end and is equal in length to the depth of the wedge you cut in the rootstock. Carefully insert the scion wedge into the split of the rootstock. Closely inspect the two pieces to ensure that the outer cambium layers touch as much as possible. Continue whittling and inspecting the scion end until you've made a clean and solid match. Don’t rush this step because the success of the graft depends on good contact between the scion and rootstock.
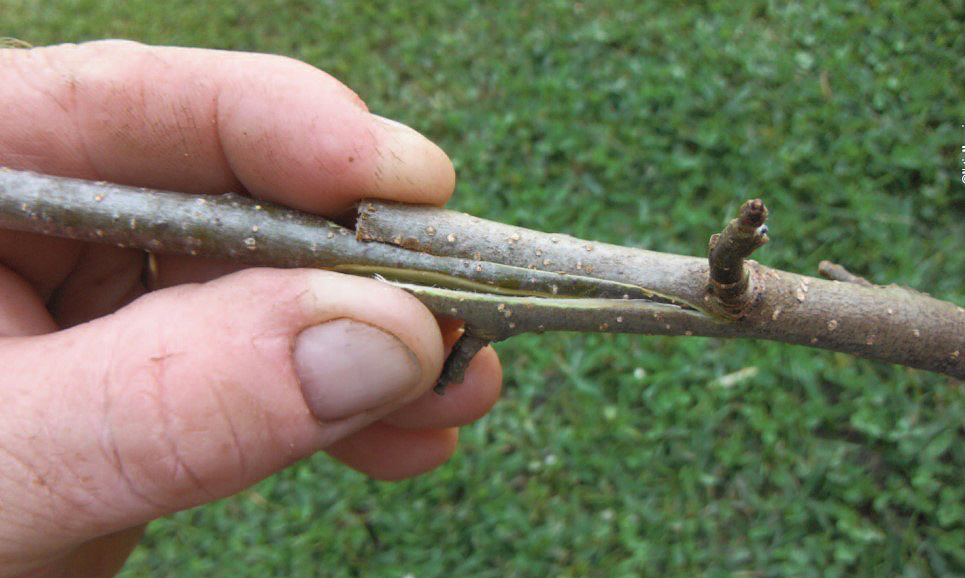
Step 6: The Bark Grafting Method
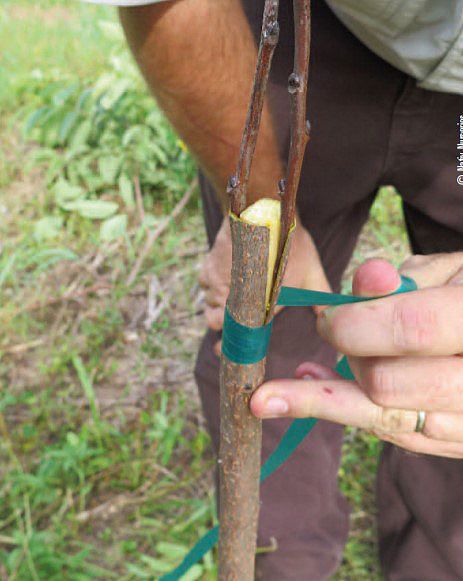
If you choose bark grafting as your preferred method, the rootstock can and should be larger than your scions. Instead of splitting the rootstock down the middle, carefully make a horizontal slit several inches long just through the cambium layer. Loosen the bark on each side of the rootstock to make room to insert the scions. It is most common with bark grafting to use two scions. Below, you can see how this has been done. Insert the scions into the slits you have made just behind the bark, one on each side of the rootstock. The scions should be touching the cambium layer.
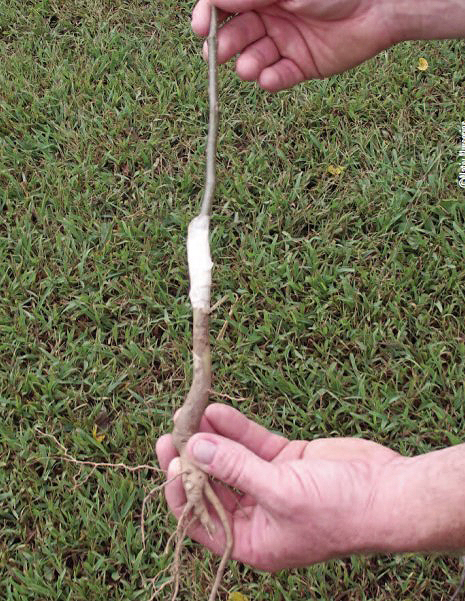
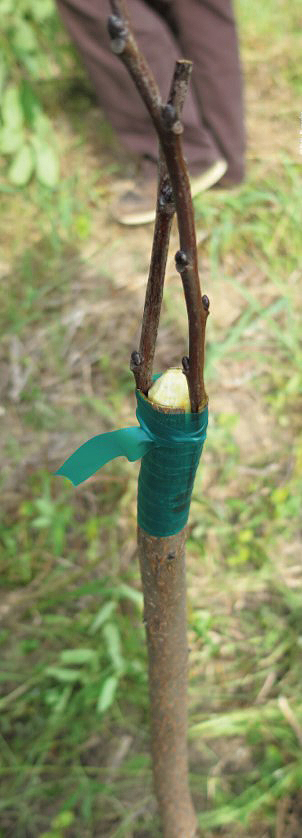
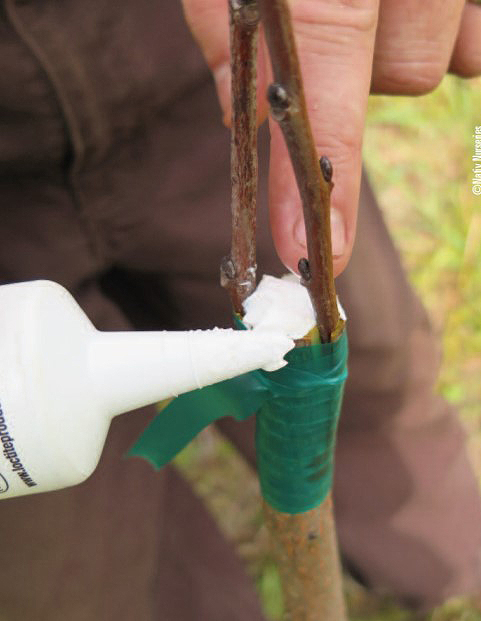
Once you are satisfied with the two pieces, you can strengthen the union by using grafting tape or masking tape to hold the pieces together. Wrap the union tightly to ensure a good bond. Some people choose to apply a thin layer of grafting sealant to cover the union. Tape and the sealant will weather and decay within the first year of growth. However, it’s important that you don’t use too much tape or grafting sealant because applying too much can cause girdling, which may damage and ultimately kill the tree. After finishing the graft, place it into a bucket of water to prevent the scion from drying out while you continue your work. Keep the union submerged in water until you are ready to plant your tree.
Plant the newly grafted trees in a fertile area where they will not be disturbed. Put the root into a hole, leaving the area where you grafted the scion about one to two inches from the surface of the ground. Mark the tip of the graft with a small piece of fluorescent-colored ribbon for easy visibility. If you decide to graft multiple varieties, you should record the variety of the tree on the ribbon and also keep a separate record of the varieties. Keeping a written record will allow you to see which trees were the most successfully grafted.
You can also plant rootstocks first and then grafted trees later. Rootstocks can be “volunteer” seedlings. Volunteer seedlings are random fruit trees you find growing in the field and decide to graft. When selecting volunteer seedlings, make sure you choose a tree in a location that you can access easily because you may need to water and fertilize the tree in dry weather. This is just one of many options for grafting.
Step 7: Maintaining Your Grafts
After you complete your grafting procedures, you'll have to water and fertilize the grafts regularly to ensure quick growth. Keep the area around the grafts weed-free to eliminate competition for needed nutrients. If the graft is successful, the scion and the rootstock will successfully unite, and the roots will begin to feed the scion. Small buds will emerge as other trees in your area begin to bud. To ensure that all of the growth goes into the scion, you should remove any suckers — small sprouts that emerge from the rootstock. Leaving the suckers in place would otherwise allow key nutrients to be diverted away from the scion.
Step 8: Protecting Your Grafts
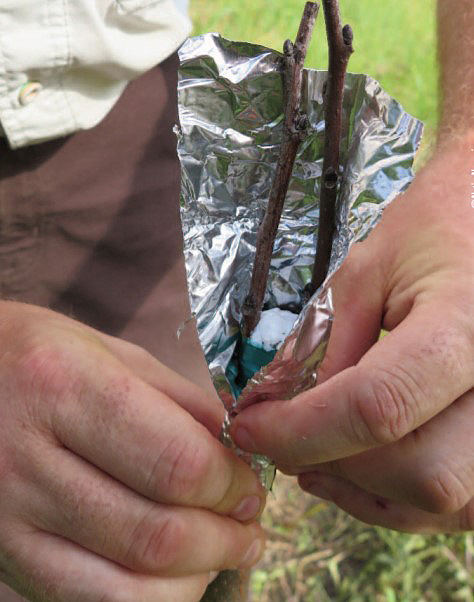
After investing your time and energy into getting a successful graft, it's important that you protect the graft from damage for the first few years. The union where the graft has occurred is quite delicate. Disturbing the union may lead to failure and death of the new tree. Protective tree tubes offer excellent protection to newly joined grafts. Otherwise, driving a stake next to your graft and loosely tying the stake to the graft can keep the union strong through windy conditions. Avoid tying the string too tightly. It’s also best to avoid using nylon or synthetic string. Instead, you should use sisal or any other type of string that will decay.
For added protection, you may also build a wire cage — similar to the wire fences you would use in a tomato garden — to surround the grafted tree. Doing so will protect the tender branches from browsing wildlife. Allowing deer and other critters to eat and tug at the newly established leaves can place too much stress on the graft and cause it to fail. You should transplant the grafted trees from their original spot into their permanent location after their first year or two of growth.
No matter where you plant the trees, it remains imperative that you continue fertilizing and watering them for optimal growth. An excellent way to ensure deep watering for your trees is to put a piece of 1-inch waterline in the hole alongside the tree as you plant it. Under the end of the pipe, you should place a handful of gravel to allow the water to filter into the hole. Leave about one foot of the pipe to stick out of the ground. Every drop of water and fertilizer you pour down the pipe will go directly to the roots of the tree and have an immediate impact on the graft's success.
Step 9: Great Expectations
If you've chosen to graft an apple tree, you and the deer will be able to enjoy apples each season after the tree begins to bear fruit. The apples will fall from the branches over a period of several weeks, which will give you time to pick out the best of the crop. In the end, you’ll be glad you took time to learn bark grafting and modified cleft grafting for fruit trees. If all goes well, your grandchildren will be able to eat and hunt over those same apple trees. After all, being a gamekeeper isn’t just about making an impact today — it’s about making a lasting impact for generations to come.