Cameras can Help to Tell some Amazing Stories
By Ron Jolly
Trail cameras have been around since the early 1980s. Early models were cumbersome at best. The trigger devices were not reliable, picture quality was often poor and 35mm film was limiting, frustrating and just plain expensive. As with most technologies, there is a single breakthrough that suddenly makes it user friendly and more attractive. That breakthrough with trail cameras was digital photography. Suddenly film cameras that were limited to 36 shots were replaced by digital cameras capable of taking hundreds of shots. There were no more trips to the film processor, and trail camera enthusiasts were able to instantly view their pictures on their camera or a computer.
Trail cameras today come in all shapes and sizes. They range from very complicated and expensive to very basic and affordable. I am one of those guys who requires simple and affordable—especially simple!
Digital trail cameras offer the choice of shooting still photos or video clips. Both are useful and provide good information as to what is happening on your property. Different settings for sensitivity, multi-shot, time-lapse and video length allow the user to capture shots in a variety of situations. I especially like the video setting when monitoring a scrape. It is fascinating to see the ritual bucks go through when freshening a scrape. The down side to video is the amount of space it takes on the camera’s memory card. For that reason, I typically leave the camera set to shoot still photos in bursts of three to five shots.
Set Up For Success!
One thing that is very helpful is to set the camera up in your yard and practice with it. Try the different settings and options to determine what is best for your situation. It is better to learn your camera's trigger speed, field of view and effective distance in a practice situation than in the field.
One of the best places to capture deer photos with a trail camera is a feeder. Other good places are trails, scrapes, fence crossings, mineral licks and food plots.
Trigger speed is not a big issue at food sources. Animals typically spend time there and will trigger the camera often. Center the food source in the camera's field of view. The optimal range of most cameras at night with a flash or infrared flash, or the distance from the target, they are most effective at 15 to 20 feet. During the daytime the camera’s sight-line is your limit. Some models are effective for greater distances, but for the most part you want to be fairly close to the target.
Most camera manufacturers recommend mounting the camera about chest height. I prefer to set the camera 30 to 40 inches high for whitetails. This eliminates photos triggered by small animals and birds and keeps a deer with his head raised, or head down, still in the frame. Remove any brush, grass or limbs that can move with the wind and trigger the camera. These objects often distract from the photo, so take the time to eliminate them.
Make every effort to point the camera north. This helps eliminate sun spots and flares during daylight. It also eliminates backlit photos and video. My preferred photo settings at a food source are; a one minute delay, one shot per event, and normal sensor. My preferred video settings at a food source are; 10 seconds high resolution, one minute delay and normal sensor. These settings work well with many different models. These settings also work well on scrapes.
Setting up a camera to capture animals on a trail or crossing requires different settings and positioning for the camera. Animals passing a trail camera often challenge the camera to wake up and take a shot before the animal is out of the field of view. This often results in empty frames. To correct this problem try to point the camera north and at a 45 degree angle to the trail or crossing. This keeps the animal in the field of view longer and results in fewer blank frames or shots with portions of the animals out of frame.
My preferred photo settings on a trail or crossing are; one minute delay, multi-shot mode and sensor set on high. My preferred video settings on a trail or crossing are; 30 second high resolution, one minute delay and sensor set on high.
Make sure that when batteries are changed in your cameras that you reset date and time. Finally, I suggest you purchase two memory cards for each camera.
Trail Camera Revelations
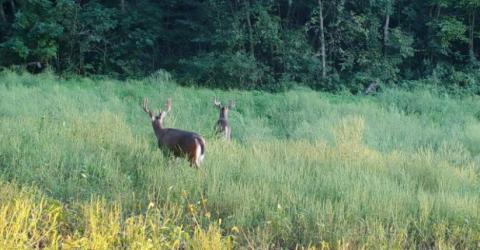
 Trail cameras open a whole new world to those of us interested in what is happening on our land when we are not there to observe. One of the most important things I get from my trail cameras is a view of animals I may never see during daylight. For instance, we captured one picture of a mature buck on our farm in 2008. We never saw him during hunting season that year and did not get another picture of him. In 2009, he was never seen on the farm and no photos of him were taken. I assumed he had been harvested but in 2010, he was back at the same mineral lick. He was just two years older and a lot bigger. We never saw him during hunting season and did not get a picture of him after October 14. We have no evidence he is still on the farm.
Since we began our trail camera program in 2007, we have been able to develop a five point criteria that helps us identify bucks we believe are four years or older. 200 pounds live weight, 16-inch inside spread, four-inch circumference at the bases, 18-inch main beam, and decent tine length are the values we use. If a buck meets any three of these five criteria, we consider him four years or older and put him on our shoot list. These values vary from region to region but on our farm, this formula has been very accurate. Experience viewing thousands of photos is the best teacher. After a while you’ll be able to be fairly accurate at aging bucks.
Build a parent folder on your computer such as “2013 Bucks.” Within that folder, create sub-folders for individual bucks on your property. Give each buck a name. Each time you get a new picture of that buck add it to his folder. Soon you will be able to identify that buck at a glance. You will learn when he is on your property and be able to formulate a plan to hunt that buck.
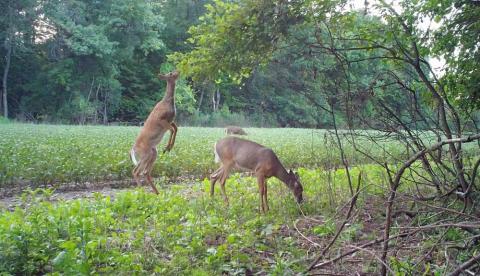
Trail camera pictures and videos offer insight into what to look for when hunting our property. They also inspire you to hold out for a specific buck and help determine the progress of bucks from one year to the next. The information gathered by trail cameras allows you to formulate a list of deer that you think have reached maturity.
Along Came Lops
In 2009, we began getting pictures of an interesting buck with a lop-sided rack. He sported a decent 8-point rack and appeared to be three years old. Night after night he appeared at a mineral lick with a mature buck we had named Lucky. Tes and I decided Lops deserved another year before being put on the hit list.
On a cold January afternoon, Lops walked into a green field where Tes was hunting. He was accompanied by a new buck that she immediately named Hershey because of his dark color. After a long look, Tes decided both bucks were three years old and let them walk. That was the first time we had seen Lops in the daylight.
Just after the 2010-2011 season ended, a trail camera photo of Lops revealed a strange situation. Lodged in the right side of Lops’ rack was the left antler from another buck. Bucks in our area do not begin shedding their antlers until late March, so we knew the antler in Lops’ rack was the result of a very intense fight. We could not tell a lot about the lodged antler but we were concerned that if that antler had a G-3, it could be stuck in Lops’ right eye.
Several days later we got another photo of Lops and the antler was still wedged in his rack. This photo did nothing to alleviate our concerns for Lops’ eye but at least he was still alive.
In late February, Tes was set up to photograph turkeys in the green field where Lops had been seen in January. A doe walked into the field and to Tes’ surprise, out stepped Lops. He was so focused on the doe that he did not notice as Tes took shot after shot. The photos revealed the injuries caused by the lodged antler and provided the first hint that Lops was blind in his right eye. Several days later, Tes spotted what she thought was a shed antler in a pine plantation. When she retrieved it, she immediately noticed hair, dried blood and flesh. She rushed home and compared it to the two trail camera photos. There was no doubt it matched the antler that had been in Lops’ rack.
Lops disappeared from our cameras after Tes saw him in February. Finally, on July 26, Lops was back on the farm at his favorite mineral lick. His rack was only half developed, but that photo confirmed he was back and blind in his right eye. The only other photo of Lops was taken at a Sawtooth Oak in September and revealed a respectable 7-point rack.
Bitter Sweet
 The 2011-2012 hunting season found Lops on our hit list. We had decided he was four years old and probably close to as big as he would get. In early December, Tes passed a shot at a buck she thought was Lops because of low light.
On December 18, I was hunting a green field when Lops and Hershey walked into the field. I studied the bucks through my Nikons and decided to let them walk. I was hoping for a chance at a bigger buck. I also hoped Tes or my nephew Steve would get a chance at him.
On January 28, Lops followed a hot doe into the same field. Tes had shot two mature bucks and Steve had made his last hunt of the year. I watched as Lops courted and pushed the doe. I was torn between shooting and letting Lops walk again. Finally I made the decision to shoot and dropped Lops in the field. After the shot, I sent Tes a text message that read—“just shot Lops. Bred doe on field edge. Let him leave and return twice before I shot. Happy but kinda sad. Never felt this way after shooting a mature buck.” She replied, “Happy and sad here too but we are blessed. Be thankful his story ends with us. Congrats! On my way!”
When Tes arrived, we walked out to where Lops lay. Together we examined him and discovered some of the scars from the lodged antler were still visible around his eye and behind his right ear.
We loaded him on the HuntVe and headed to the skinning shed. Lops met four of our five criteria for a shooter buck. He weighed 185 pounds but met our other four standards for a shooter. The real revelation came when I skinned his skull for a European style mount. The base of Lops’ right antler was malformed. Behind that antler base calcium deposits on his skull marked where the lodged antler had cut through skin. Under his right eye were more calcium deposits. The fine bones in his nose were partially missing but the real revelation was his age. The teeth in his lower jaw were very worn. Comparison to QDMA’s jaw-bone aging chart indicated he was in his sixth year!
Another lesson learned. Even with all the trail camera photos and daylight sightings we had misjudged Lops’ age. Everything suggested Lops was four years old. He never sported a very impressive rack and unlike most mature bucks in our area, he was seen in daylight on several occasions. I was finally at peace with taking Lops.
Close
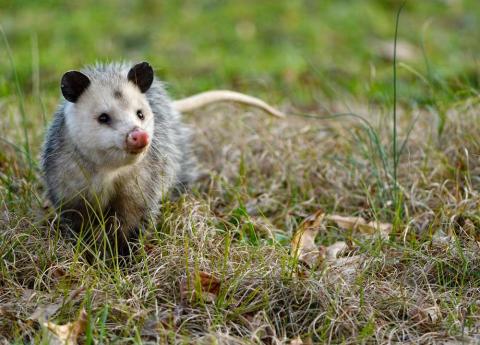
Trail cameras are really fun to use and they give you great insight into what animals call your property home. In addition to deer we have gotten shots of hogs, turkeys, dogs, foxes, raccoons, rabbits and unsuspecting trespassing hunters. Oh yea, remember at the beginning of this story I told you to buy two SD cards for each camera? Just remove the card from the camera and replace it with the formatted card in your pocket. Now you can head home, download all the information your trail camera has gathered and use that information to your advantage on your next hunt!