




Ken Johnson
Each year in the United States, outdoor enthusiasts of all descriptions set out on foot to explore nature and suddenly find themselves lost. Some go astray in pursuit of the perfect outdoor photo-op. Many are casual walkers, site-seers, or day-hikers who simply wander off trail. Missing hunters, fishermen, and backpackers round out the estimated 50,000 search-and-rescue (SAR) calls for assistance placed annually. The National Park Service has determined that approximately 41% of those lost souls made critical navigational errors that led to their predicament. This article, then, offers some practical advice on an easy way to successfully navigate such situations and return home safely via a self-mapping method known by the acronym P-A-U-L, with each letter representing a key step.
The PAUL method was first published in 1991 by former Green Beret, Don Paul. Very simply, it is a compass-based, self-reliant land navigation system, that doesn’t rely on GPS or topographical maps in the same way that other route-finding methods like orienteering do. That makes PAUL ideal for exploring new or uncharted terrain. The system emphasizes setting your compass direction, checking it often, and documenting your path so you can always get back to where you started.
Those Who Become Lost
In the Great Smoky Mountain Park alone, it is estimated that 90% of all annual search-and-rescue calls involve day hikers. Related data indicates that nationwide, approximately 13 people per day get reported lost within our national park system.
Most walkers and day hikers become lost for one very basic reason…they fail to properly prepare. Folks assume a short trip doesn’t need a plan, so they carry little more than a water bottle and a cell phone. Some trendy-types even go barefoot. But lack of cell service, poorly marked trails, an injury, or extreme weather can quickly turn a leisurely jaunt into a crisis. These individuals comprise 48% of all those who end up needing assistance.
Then, there is the group of off-trail travelers that includes hunters, fisherman, and backpackers. While not the largest single category of lost wanderers, they often face additional challenges — especially those traveling in unfamiliar terrain or traversing waterways, those pursuing or tracking game, or those traveling alone or with an inexperienced group.
Fortunately, most lost individuals are eventually found, or they manage to self-rescue. However, the high volume of annual rescue calls underscores the importance of preparedness, staying on marked trails, and using rudimentary navigational skills like the PAUL method.
The Tools to Stay on Course
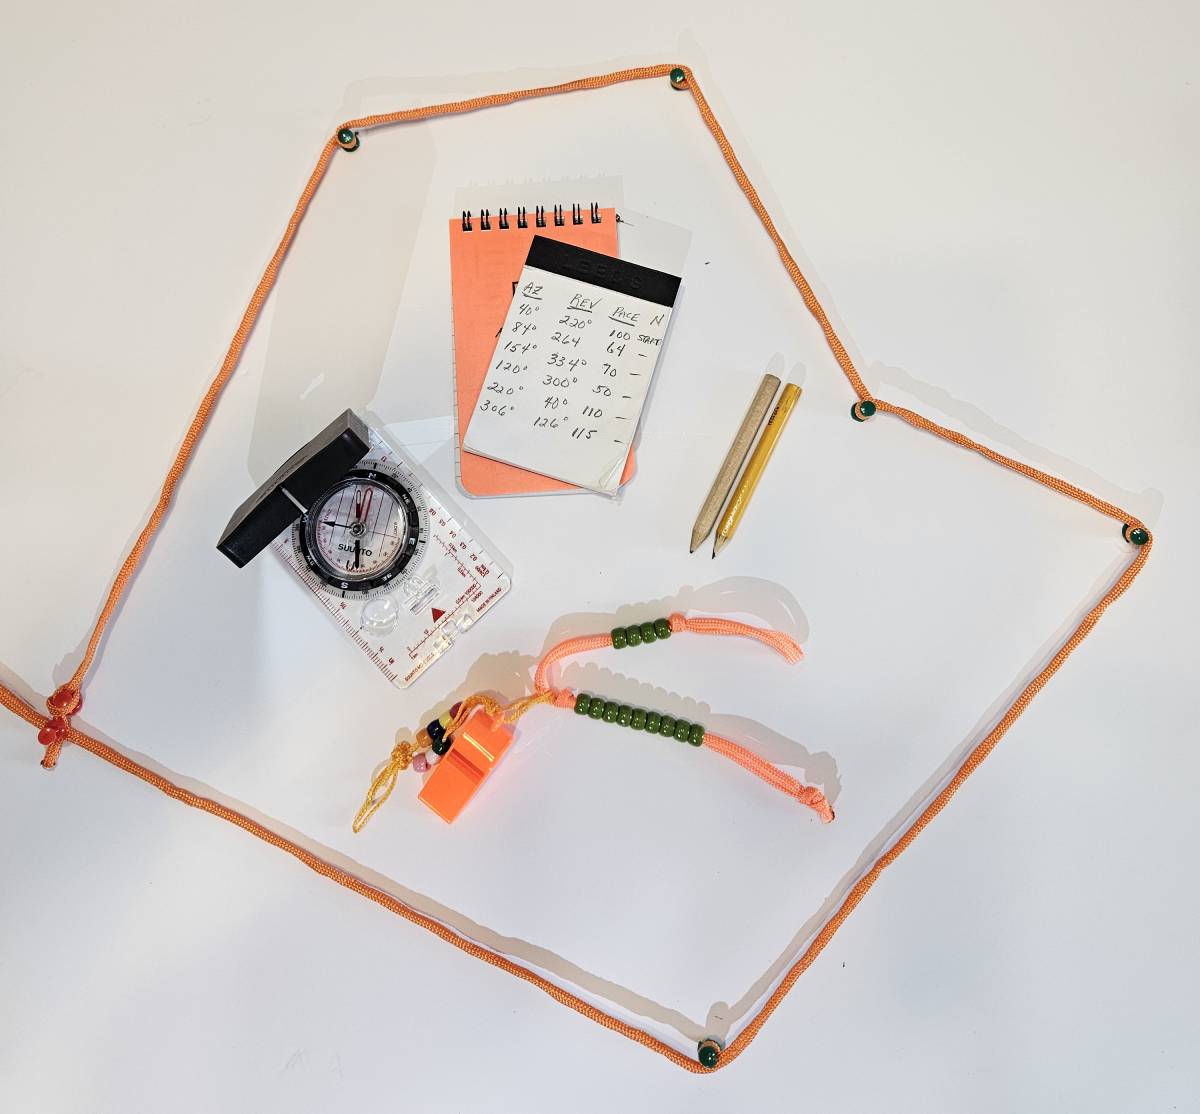
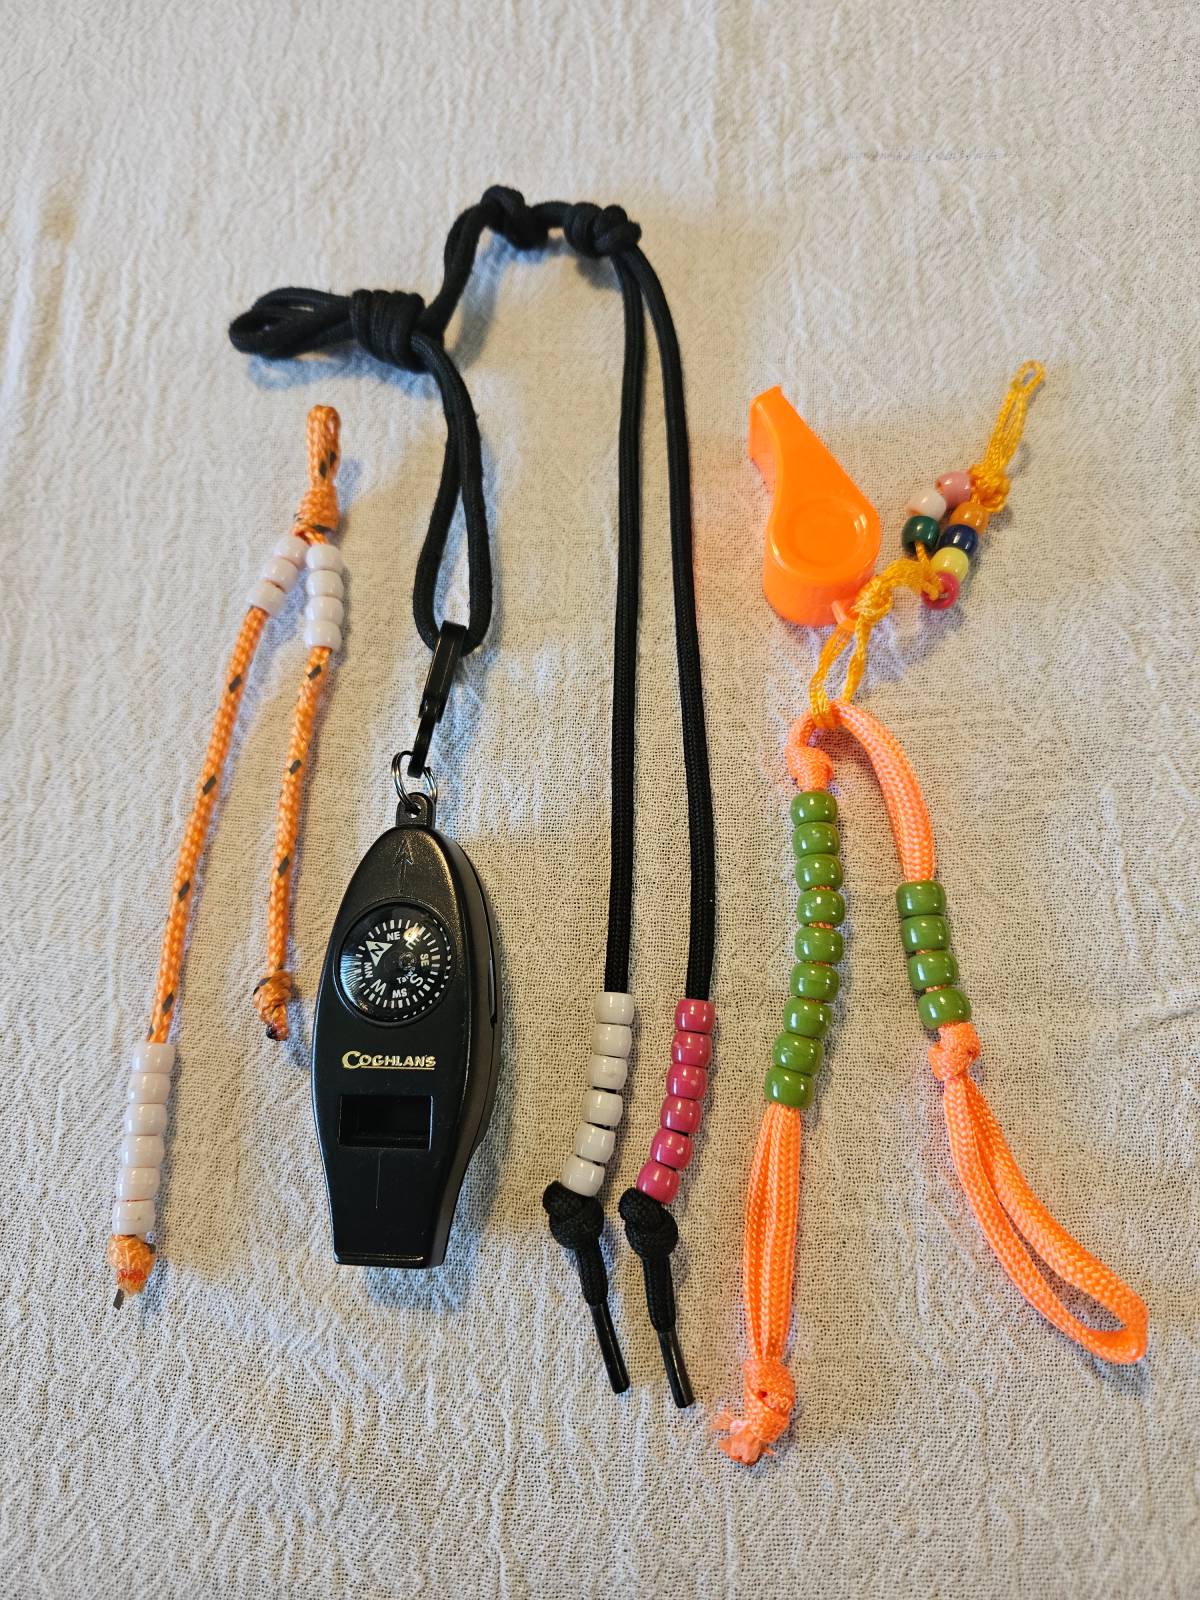
An unavoidable truth about ambling afield is that technology can’t always be counted on when trouble arises. Batteries die. Equipment gets lost. Cell service can be spotty or absent. In fact, there are dozens of locations across the U.S. and Canada where cell service is either absent or extremely limited. So, if you plan to visit such places, carry some personal survival items including a signaling device such as a whistle. Share your itinerary with someone responsible outside the area. Then purchase the best baseplate compass you can afford to use with the course-plotting method described here. I recommend the SUUNTO MC-2 compass to my bushcraft students because of how user friendly it is. However, there are a number of quality compasses on the market. Just be sure you learn how to use whichever model you choose.
Other navigation tools that are recommended include:
- Log Book – A travel log that captures azimuths recorded in compass degrees, pace counts, reverse azimuths (backtrail), and notable features used as signposts.il.
Example Log:
|
Azimuth |
Reverse Azimuth |
Pace Count |
Notes/Signposts |
|
1. 130° |
310° |
100 |
Start Indian statue |
|
2. 220° |
40° |
125 |
Cut pine |
|
3. 310° |
130° |
75 |
Duck pond |
- Measuring Device – Avid hikers and the military count pace beads or “ranger” beads on a paracord tether to roughly keep track of the distance between directional changes along the compass-route. To use pace beads, a bead is moved each time a traveler has walked a specific distance…usually 100 meters, yards, paces, etc. Some classes promote carving notches on a stick to measure distance instead. Others endorse using a wristwatch to measure the elapsed time between direction changes. Off-road ATV users can use their odometers to measure distance.
Setting a Direction of Travel: Azimuth
Beginning compass users need not worry about orienting their device to a map with the PAUL method. The simplicity of this approach is to use the magnetic properties of your compass to set a direction and facilitate walking a straight line while keeping track of the distance traveled.
- Hold the compass level: Keep the compass flat and steady chest-high, so the magnetic needle can settle.
- Aim at a target: Imagine your compass is a pistol. Bring it to eye level and extend it out toward a prominent land-feature to aim. Use the direction-of-travel arrow on the baseplate to point directly at the object or landmark.
- Rotate the bezel: While keeping the compass aimed at the target, turn the compass housing until the orienting arrow aligns with the north end of the magnetic needle. (The north end of a compass needle is usually red).
- Read the azimuth: The degree marking on the bezel that aligns with the direction-of-travel arrow is your magnetic azimuth. Always record your azimuths in your log. The reverse of your azimuths will serve to safely guide your return.
To clarify, a reverse azimuth is simply 180° in the opposite direction from the actual forward azimuth. For example, an azimuth of 360° has a reverse or back azimuth of 180° which represents the direction you came from. Simple.
Practicing the Steps if the PAUL Method
- P – Positive Azimuth
Pick out a notable land-feature and its specific compass direction (azimuth) and stick to it. This is your magnetic handrail in the wilderness. Keep the distant landmark in sight to help maintain alignment as you go forward. Strictly following an azimuth will empower you to walk a straight line over uneven terrain. Record each change of forward azimuth in your log as you move.
- A – Azimuth Check
Periodically check your compass to ensure you’re still on your set heading. This prevents accidentally drifting off course. If you suspect you have drifted or must adjust your route because of an obstruction, stop, realign, and continue.
- U – Uniform
Use your log to create a map of the route. Note major terrain features and mark distances or time traveled. This allows you to retrace your steps if you get lost.
- L – Land Navigation, Layout (or “Loop” in some versions)
This refers to the idea of making a straight-line travel vector from your immediate position back to your starting point. However, this is an advanced skill where you create an actual map of your travel route on paper or level ground based on the azimuth log you have kept. That feat is best attempted after you have mastered the basics of setting a direction and accurately keeping a log. Until then, you can use your reverse azimuths to lead you directly back to your starting point.
Finally, here is a simple compass exercise to help you get better acquainted with the PAUL method:
- Pick a wide-open area to practice like a park, pasture, an empty lot, or ball field.
- Plant a flag or place a bright-colored object as your starting point.
- Pick out an object or landmark and set a compass direction of, say, 130°.
- Walk 50 paces on that setting keeping a straight line. STOP.
- Set an azimuth at a right angle (90°) off your starting direction to 220°.
- Walk 50 paces in the new direction. STOP.
- Now strike an angle of 90° off the previous direction to 310°.
- Walk 50 paces in that direction. STOP.
- You have now navigated three sides of a square. HOME or the START should be immediately at a 90° angle from your final position, at an azimuth of 40°. If you have kept an accurate pace count, you will be approximately 50 paces from where you started. Test yourself and see how close you can come to your starting point.
As you become more confident, use a smaller target at the start. For example, place a quarter or a pocketknife in the grass and see how close you can navigate a square back to the same location. Then experiment with creating your own new azimuths as you strike out on your own to explore. The key is practice, practice, practice…and keep a log.
Remember, search and rescue statistics show that approximately 4700 people a year get classified as “lost” within our national parks and forests. Broader studies that have included private parks, hunting preserves, floodplain trails, scout reservations, and various other wild places suggest that the number of lost adventurers is probably closer to 8000 folks annually. Such a high number of incidents underlines the importance of using solid land navigation practices. Don’t let yourself become a statistic. Learn compass use and adopt the PAUL method for safe off-trail travel.