Brad Fenson
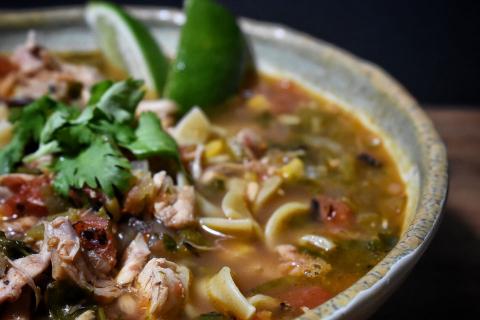
When you’re feeling nostalgic, and turn on an old duster, or western movie, you’re sure to see a string of chuckwagons, with the cooking rig following up the rear. The fire was the only heat source for cooking, and cast iron was the vessel of choice for everything from stew and beans to soup and cornbread.
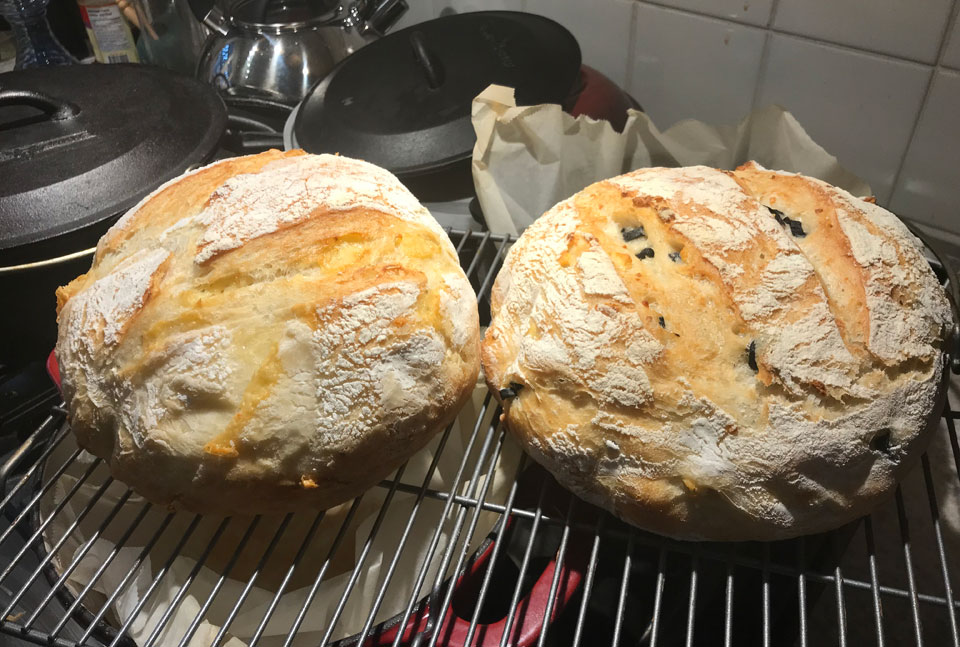
Cast iron Dutch ovens are awesome for baking your favorite bread, cakes, pies, cobblers, or other treats that require prolonged heat to cook properly. Today, most people toss their dough or batter in a convection oven and tap their watch waiting for it to be done.
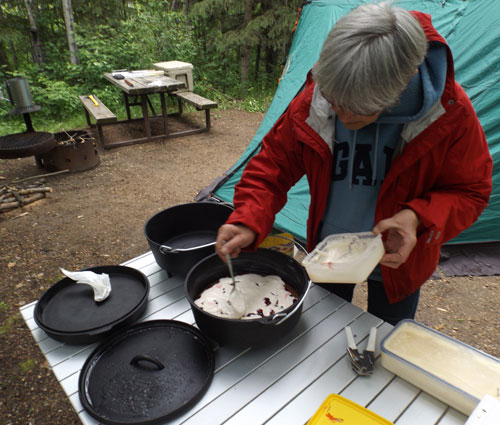
Dutch ovens are great on camping and hunting trips, or even hot summer days when you don’t want to turn the oven on indoors. They can be used on a Camp Chef stove, with a diffuser plate for the oven legs to balance on, and a Dutch Oven Dome that traps, diverts and circulates heat creating a convection oven that is very effective for making any baked goods with the perfect heat.
All Camp Chef Dutch ovens, in 10-, 12-, 14-, or 16-inch models, have matching diffuser plates, domes, and even foil liners to make clean up simple and easy. If you don’t have a camp stove, try using charcoal briquets under and on top of your Dutch oven, for a rustic sense of accomplishment.
Here is a simple bread recipe that is sure to get you experimenting with Dutch oven baking.
Easy Rustic Dutch Oven Bread
This dough will make 2-4 loaves, depending on what size of loaf you prefer.
Ingredients:
6 ½ cups all-purpose flour
1 tbsp salt
1 ½ tbsp instant yeast
3 cups warm water
 Directions:
1. Mix all ingredients into a rough, sticky dough. You will need to use a large bowl or plastic sealable container that is at least 6 quarts in size.
2. Cover the bowl or container with a lid or plastic wrap and let the dough rise for 2 hours on the counter. Next, put the dough in the refrigerator for at least 2 hours, or up to a week!
3. When you’re ready to bake a loaf, sprinkle some flour overtop and remove about a third of the dough (or other desired amount) from the bucket. On a floured work surface, form the dough into a ball, and place it on a generous piece of parchment paper. Sift some flour over the top, and let it rise, uncovered at room temperature, for 1-2 hours.
4. When the dough is almost done rising, preheat your oven to 450℉ and place your Dutch oven inside to heat it too.
5. When everything is heated up, take a sharp knife and cut a few slits in the top of the loaf, about ½-inch deep. Take the lid off the Dutch oven and drop your risen loaf, parchment and all, into the pot. Put the lid back on and bake for 25 minutes. Then, remove the lid and bake for 10-20 more minutes, until the crust is golden brown. Remove the loaf from the pot and cool completely on a cooling rack before slicing!
TIP: you can vary this recipe by using some add-ins before the second rise. When you prepare to form a loaf from the bigger supply of dough, try kneading/folding in one of these variations:
Option 1: ¾ cup of raisins and some cinnamon sugar (mix equal parts cinnamon and sugar)
Option 2: 1 ½ cups of a mixture of olives and feta (make sure to rinse and dry the olives and feta if they are in a brine to remove some of the excess salt and prevent too much moisture from entering the dough)
Option 3: 4 ounces of diced cheddar or swiss cheese
Briquet 101
The math on how many charcoal briquettes to use with your Dutch oven is easy. Take the size on the lid and multiply it by two. For example, if you have a 12-inch Dutch oven - 12 x 2 = 24 charcoal briquettes. To get even cooking, place briquettes around the top and bottom of your Dutch oven. The placement of briquettes is important for even heat, so be sure to place them on both the outer rim of the lid and directly underneath the Dutch oven in the form of a circle.
The cooking method and dinner contents will dictate how you decide how many charcoal briquettes go on top and bottom.
When baking, 75 percent of the briquettes are placed on top of the Dutch oven lid, and 25 percent on the bottom. The strategic placement will ensure the contents of the Dutch oven do not burn.
If you need more heat for frying, simmering, braising, or boiling, 80-100 percent of the briquettes will be placed underneath the Dutch oven for more concentrated heat.
Always try to cook on a dry surface or use a metal disk or table.

Need wild game meat for a recipe you've been wanting to try? Check out GameKeeper Butchery. GameKeeper Butchery is dedicated to procuring the finest assortment and highest quality of specialty meats from the United States and around the world. Our commitment is to deliver the safest, freshest and most wholesome products.