Dave Edwards | Originally published in GameKeepers: Farming for Wildlife Magazine. To subscribe, click here.
It’s been said that “good farmers understand the value of well-tilled soil…and the dangers of over-tilled ground.” Soil compaction, resulting in what is commonly called a “hardpan,” has been recognized as a potential limiting factor in crop production since farmers transitioned from horse-drawn plows to heavier tractors and more aggressive tilling strategies in the early 1900s. From a wildlife manager’s perspective, where planting food plots have become “standard practice” on most properties, it is important to learn and understand farming techniques and soil management practices. Doing so will not only help you grow successful food plots to enhance the wildlife value on your property, but will help you get the most out of your time, efforts and money.
“Subsoiling” is a soil management strategy commonly used by farmers to minimize soil compaction and maximize crop production, but also has applications when managing quality food plots for wildlife. However, subsoiling is often overlooked and/or misunderstood by many food plot managers.
In my travels as a wildlife consultant, I work on properties across the country and routinely see food plots where the manager has “planted by the book,” meaning they have properly amended the soil to ensure desired pH and adequate nutrients are available, prepared a smooth seed bed, and planted seed at proper rates under ideal conditions, yet as the crop matures it becomes distressed or stunted. In many cases this manager doesn’t recognize the “underlying” problem because these plots produce respectable crops and generally do well until the roots reach the compacted soil or the plot experiences a dry or wet period resulting in stressed or dead crops.
pressure of equipment on the soil and
repeated disking/tillage over several years
that loosens top soil. This causes the finest
particles of soil (clay) to migrate downward,
accumulating and binding, creating a very
dense layer.
More times than not, the culprit is an unseen layer of compacted soil lying slightly below the surface. Under these conditions, food plots are producing forage, but do not experience optimal growth, or in some cases actually fail, essentially cheating the manager (and wildlife) of optimal results for their efforts. By identifying and addressing soil compaction problems, managers can significantly enhance the growth and survival of a food plot allowing them and the wildlife they are managing to gain the maximum benefit from their efforts.
Understanding Soil Compaction
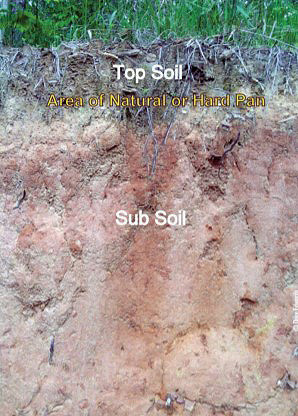
Soil compaction results in a densely compacted layer of soil that lies between the topsoil and subsoil. This compacted layer is often called “the hardpan.” Generally speaking, depth of hardpans vary with soil type and farming strategies but are often 4 to12 inches below the surface and are caused by the weight and pressure of tractors (and other equipment) on the soil and repeated disking/tillage over several years that loosened top soil. This causes the finest particles of soil (clay) to migrate downward, accumulating and binding, creating a very dense layer
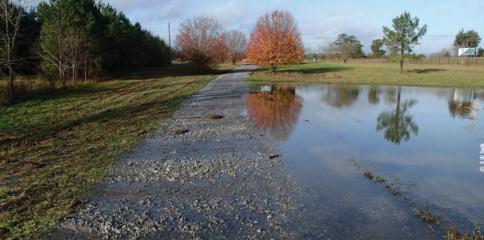
In food plots, we commonly find hardpans 6 to 8 inches below the surface of the soil, which is coincidentally the depth most disks/harrows plow/break the ground. It may help to imagine the hardpan as a layer of concrete below the surface of the soil. As you would expect, water and oxygen do not travel well through hardpans. Thus during periods of excessive rainfall, water may lie in puddles on the surface of the hardpan then evaporate before it can seep down into the deeper subsoil.
In some cases, standing water deteriorates and kills crops before it evaporates. Similarly, during periods of low rainfall, food plots that have a hardpan caused the topsoil to dry out quickly because of its inability to draw-up moisture from the subsoil, resulting in stressed or dead crops.
In my experience, the tell-tale sign of soil compaction issues is when food plot crops respond quickly to, or appear very sensitive to, either a mild drought or significant rain event. That is, the food plot appears to get very dry or very wet, very easily, causing crops to stress. As such, these are usually the first food plots to start showing signs of drought during a dry period. Because soil compaction occurs belowground and out-of-sight, it is more difficult to detect than many other more obvious factors affecting forage growth and production. The old saying of “out-of-sight…out-of-mind” certainly holds true here as many managers don’t even think about it.
A Perfect Example
To help identify and understand the effects of a hardpan, let me describe a scenario that played out on a property I manage in west Alabama. The 1,500-acre property is located in the floodplain of the Black Warrior River and has a diversity of habitats including bottomland, hardwoods and pines. Ten food plots were scattered across the landscape ranging in size from 1 to 3 acres. Over the past 15 years, the previous hunting club had planted these food plots each fall for hunting and occasionally planted a few fields in summer crops.
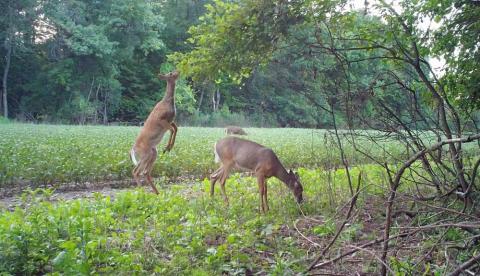
With only 10 fields totaling 15 acres devoted to food plots (less than 1% of the property), we strategically created 10 new food plots, This increased the total food plot acreage to 40 acres (or approximately 2.5% of the property), allowing us to incorporate and manage both summer and fall annual plots, as well as perennial crops. With a goal of producing trophy deer, we devoted 60% of the food plot acreage to summer plantings and perennial clover to ensure high quality food sources were available for deer during the antler growing & fawning periods (summer).
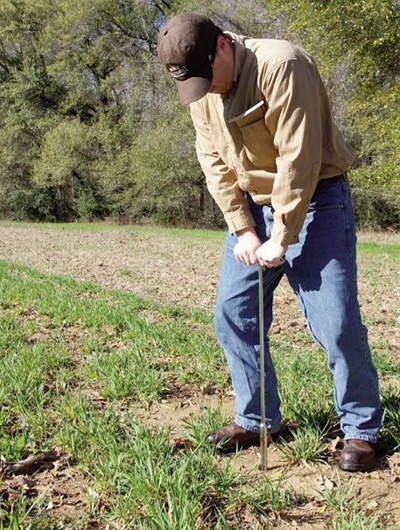
soil. A soil probe is simply a 2 to 4 foot long metal rod -
sharpened on one end to penetrate the soil, and a handle
on the other end to assist in pushing the probe through the
soil.
Because the soil and climate were well suited for growing perennial clovers, we strategically established many clover plots in fields near bottomland sites that were oriented north-south to take advantage of afternoon shade during hot summer days to conserve soil moisture. Because clovers are pH sensitive and do best when the soil's pH ranges between 6.0 and 7.0, we tested soils and applied required lime in early summer to ensure the soil pH was where we needed it for our clover plantings. The previous club had done a good job in the past as soil pH levels on the existing food plots were above 6.0. However, on newly created food plots where soil pH levels ranged from 5.1-5.6, many tons of lime were applied to raise the pH.
During the first spring after the initial fall planting, clovers were doing great. They jumped out of the ground quickly and afternoon thunder showers seemed to dump water on the plots just when they needed it. After several consecutive days when temperatures exceeded 95 degrees, some of the clover plots became extremely stressed and large areas within them died. We blamed the heat and replanted the next fall. The second year started off similar to the previous year, with clovers growing well and deer using them heavily. However, a midsummer 30-day drought resulted in several clover plots fading and eventually failing. We were frustrated to say the least and blamed Mother Nature again for our failure in maintaining the clover.
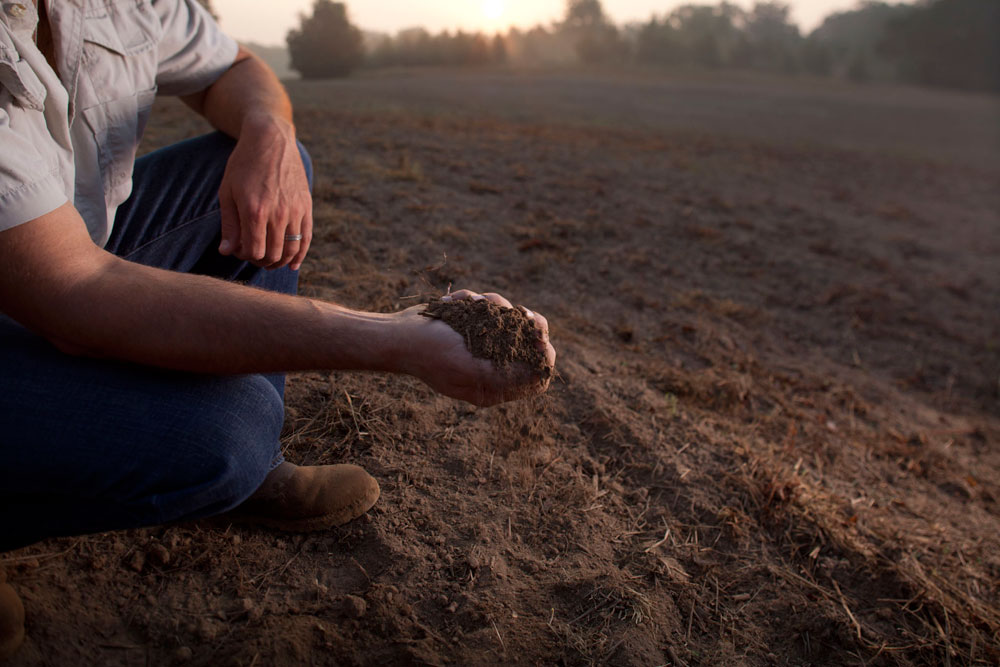
Call us stubborn, but clover was once again replanted in year three. The following winter was extremely wet and many of the fields became soggy. As spring came around, some of the fields had the best stand of perennial clover I had seen, while others were still soggy with little clover growing. While riding around assessing food plots and making notes on management needs, it hit me like a ton of bricks….every clover field that struggled was one of the original food plots – those that had been plowed and planted for at least 15 years by the old hunting club. I grabbed a soil probe out of my toolbox and began sticking it in the ground checking for a hardpan. I had found our problem!
Due to the excessive plowing, heavy fertilizer buggies, lime trucks, etc. over the years, every one of the older food plots “tested positive” for the presence of a hardpan about 6 to 8 inches below the surface. Despite periods of extremely high temperatures, moderate droughts, and wet winters, clover planted on newly created food plots struggled some, but overall did well and survived all 3 years. Because these food plots were “new” a hardpan was not present which allowed roots and water to penetrate deeper into the subsoil layers. During hot and drought-like conditions, clovers were able to utilize this deeper soil moisture to survive.
Conversely, during the wet winter, rainfall soaked through the soil column into the deeper subsoil allowing the topsoil on the newly created food plots to drain and dry quicker during spring for optimum clover growth. After subsoiling the original food plots, clover was replanted…again! Mother Nature put the fields to a test again as we experienced a few dry spells and extended periods of extreme high temperatures. Although they stressed some during these trying conditions, all of our perennial clover fields, including the older food plots where we had experienced so much trouble, made it. Subsoiling made all the difference in the world and without question increased growth and survival of our clover.
Detecting Hardpan
Hardpans can be easily detected in food plots using a soil probe, which is a 2 to 4 foot long metal rod - sharpened on one end to penetrate the soil, and a handle on the other end to assist in pushing the probe through the soil. You can make a probe out of rebar or purchase one from a forestry supply company for about $75.
The best time to check for hardpans is when the soil is not extremely wet or dry. Insert the probe at various locations across the food plot. As the probe is inserted, the force required to move it through the soil should remain about the same unless a hardpan is reached. Upon hitting a hardpan, it will take much more effort to push the probe. It is important to understand that a “natural pan” normally exists between topsoil and subsoil layers of most soils, which will cause some resistance when probing the soil. This is the area where these two layers merge. However, a true “hardpan” will be very obvious as it is much more densely packed and harder to penetrate with a probe.
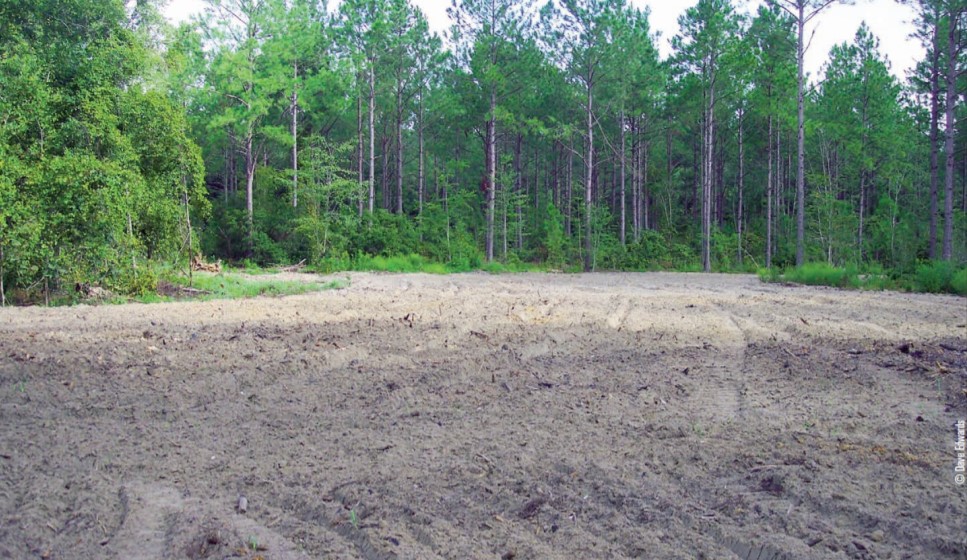
struggle or fail. This can be because of the existence of a hardpan
and the only way to remedy the problem is by subsoiling. Here you
can see spotty growth in this little plot which was prior a logging
deck.
From my experience, hardpans in food plots are often 6 to 8 inches below the surface, which is the depth at which most disks turn over, and may be 2 to 10 inches thick, depending on soil type and age of the field. Also, hardpans can sometimes be detected while plowing a field. Because a hardpan is…well…hard, disks will often bounce as they hit the hardpan. In some cases, disks may bite into the hardpan and bounce along, causing the tractor to jerk. These fields begin to get “wavy” as you ride across them due to the bouncing of the implement. Although this is not a technical method of detecting a hardpan it is something good to know, this way further discovery can be done if you experience this.
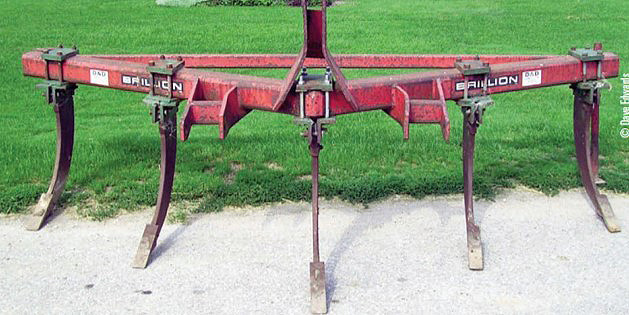
Breaking a Hardpan
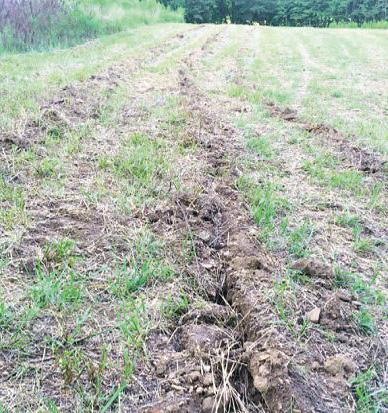
Breaking the hardpan is often referred to as “subsoiling,” which breaks up the soil to depths of two feet and fragments layers of compacted soil allowing water and roots to penetrate. While there are a handful of different implements that can be used to subsoil, a subsoiling chisel plow – simply referred to as a “subsoiler” - is the most common.
Subsoilers do not invert or turn the soil like a moldboard plow used to prepare the field to plant; they are simply very heavy-duty steel shanks tipped with blades that drive deep into the soil and are pulled along to break the hardpan below the surface. While some soil is brought to the surface as the subsoiler is pulled along, the only evidence of disturbance on the food plot will be small trench-like furrows or lines left by the shank(s) of the subsoiler.
As you can imagine, subsoiler plows cause significant soil drag and require a tractor or dozer with at least a 50 horsepower engine. A good rule of thumb is 10 to 15 additional horsepower is required per shank than on a chisel plow. Most plows have 1 to 5 shanks that are set 9 to 12 inches apart. If you do not own a subsoiler, many companies rent them. However, it is a valuable food plot implement I recommend owning if you manage many acres.
The number of passes needed to adequately break the hardpan will depend on the width/number of shanks on the subsoiler being used and severity of the hardpan. In most cases, food plot managers can effectively break the hardpan with complete coverage of the field in a single direction. That is, one pass over the whole field (if shanks are as wide as the tractor). For good measure, I generally switch directions (90 degrees) when I have covered the field once and begin breaking “across the grain.” This further breaks the hardpan and improves results (and makes me feel better).
Due to the significant soil-drag and horsepower needed to subsoil, which results in burning a good bit of tractor fuel, do not pull the subsoiler any deeper in the soil than needed. Deeper means more fuel which means more money.
plow used to prepare the field to plant; they are simply
very heavy-duty steel shanks tipped with blades that drive
deep into the soil and are pulled along to break the
hardpan below the surface.
As previously mentioned, hardpans are normally 2 to10 inches thick. When assessing hardpans with a soil probe, you should be able to determine a fair estimate of the thickness of the hardpan. As you push the probe into the soil, you will feel pressure as you reach the top of the hardpan. As the probe pushes through the hardpan and into the subsoil, the effort needed to push will be significantly less. Note the depth at which pushing gets easier as this will be the bottom of the hardpan and the depth you will need to set the subsoiler when plowing. In some cases the hardpan is so thick and dense it is impossible to push a handheld probe through the hardpan. If this is the case, inspect the “soil column” in the furrow made by the subsoiler on your first pass. If you cannot visually see the hardpan, use the soil probe to poke the soil profile feeling for the dense layer of hardpan.
Generally speaking, subsoiling every 2-3 years is recommended to benefit soils, keep hardpans from developing and enhance plant growth/survival in food plots. A few areas that inevitably have soil compaction and benefit from subsoiling are logging decks and logging roads. It is not a coincidence that many food plots planted on logging decks appear stunted and are less productive than other food plots. When converting a logging deck or logging road into a food plot, the first step after clearing and cleaning the area up should be to subsoil. Depending on soil types and conditions during the activity, skidders and other heavy equipment used during a logging operation can significantly compress underlying soils. If not addressed, food plot performance on logging decks or other compacted sites will be marginal at best.
Just Another Tool
With much focus on amending soils with lime and fertilizer, preparing good seed beds and choosing a seed blend that is well suited for your area, many food plot managers overlook and/or do not understand the effects of soil compaction on their success. Recognizing that a hardpan exists is the first step in identifying a soil compaction issue. As you read in my battle with growing clover, it took me 3 years to figure out why the perennial clover plots were failing. With the amount of time, effort, and money spent replanting and managing the clover fields during this 3-year battle, I can assure you that I routinely check for soil compaction if a food plot is not performing as expected.
Although it can play a significant role in quality soil management, breaking hardpans by subsoiling is not the end-all solution to food plot problems and managers will always be faced with other limiting factors and extreme weather conditions. Subsoiling is simply a good farming practice and another tool for wildlife managers that will enhance the growth and survival of food plot plantings resulting in healthier crops and ultimately healthier wildlife.