Bill Gibson | Originally published in GameKeepers: Farming for Wildlife Magazine. To subscribe, click here.
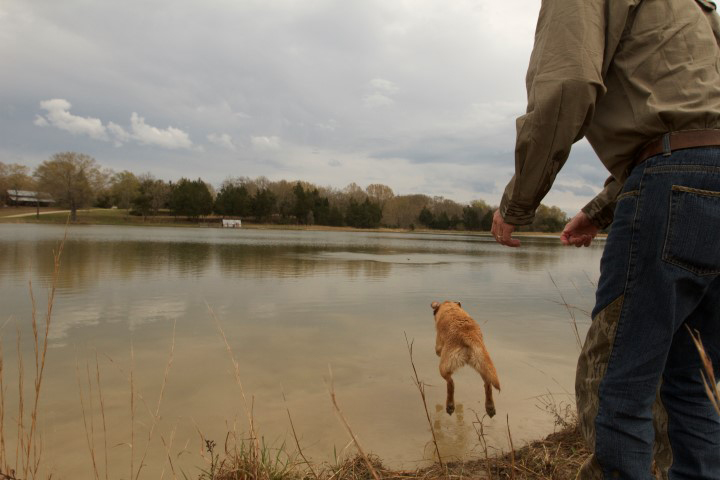
One of the most important attributes of a well-trained British Labrador retriever is steadiness to shot and fall. This should hold true in all situations, whether you are in a duck blind or hunting rolling fields for upland game. As training for steadiness progresses, we have occasionally had a problem with unwanted movement by the dog as the directional hand signal is given-prior to giving the verbal release command.
What Do We Mean by Unwanted Movement?
Unwanted movement is undesired movement from your pup, where prior to giving a cast command, your pup takes off at the first sight of hand movement from the handler. This is unacceptable both, when you have positioned your pup for a cast from the heel position or from a remote position where you have stopped your pup on the whistle and wish to give a hand signal.
What Caused this Problem?
It is likely the result of using poor training techniques during early steadiness training. Also, the pup might have been switched from working on-lead to working off-lead before it had mastered basic obedience on-lead. Simply put, a solid foundation was not laid during early training and as a result a crack begins to develop. How do you fix the crack and steady the dog so that they take the precursor cast (arm positioning) without bolting before the verbal release command is given? Luckily, this fault can be corrected. However, like most other training issues, the correction requires backtracking, patience from the handler, and a great deal of consistency and repetition.
How do You Correct Unwanted Movement?
basic obedience. You want the dog steady to the shot or
any arm movement until you give a command.
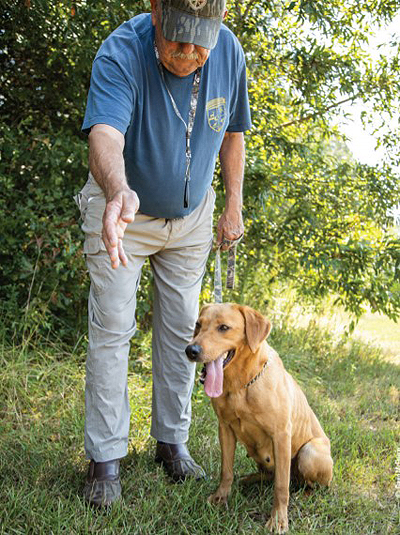
We always begin correcting unwanted movement by going back to basic obedience. First and foremost, we properly place a slip lead on the pup. The correct way to place a slip lead on a dog who heels on the left side is to face the pup and form a “P” with the slip lead and put it over the pup’s head. If the pup heels on the handler’s right side, the opposite is true. In this case you should face the dog and form a “q” with the slip lead.
Next we heel the pup out into a mowed training area and give the “sit” command. Now with the pup sitting in a heel position, we throw a dummy out as we would normally do. While holding onto the slip lead with our left hand, we bend over and extend our right arm out so that our right hand is above and directly in front of the pup’s face. However, instead of immediately casting the pup with a verbal command, we waive our hand in front of the pup’s face without giving the verbal command to cast the pup. If the pup perceives this as a release command and bolts or breaks, we restrain him with the slip lead and return him to his original position at heel.
Then, with the pup at our side, we give the command “heel,” walk pup out to the dummy, give the “sit” command and we bend over and pick up the dummy. This is denying the pup the reward of making a retrieve and indirectly teaching the dog that he will not get to make a retrieve unless he is completely steady. We then heel the dog back to the original starting point. Repeat the scenario until the pup is steady to our arm movements, and then after waiving our arm, we hold our arm steady and pointing in the direction of the dummy and then verbally release them to make the retrieve. We continue this drill until the dog remains absolutely steady to the initial arm movement and only then will we release the pup for the retrieve.
What Have we Accomplished?
Again, if at any time the pup attempts to go before the verbal command, we walk out with the pup and make them sit while we retrieve the dummy. Then walk back to the original spot and start over. So, why do we walk out and retrieve the dummy our self? Because the pup will soon associate the denial of their reward (the retrieve) with the attempted break. Since the unwanted behavior immediately preceding the denial/punishment was the attempted break, this unwanted movement will become extinct over time due to the fact that your pup wants to be rewarded with a retrieve.
the left side is to face the dog and form a “p” with the slip
lead and put it over the pup’s head. If the pup heels on the
handler’s right side, in this case you should face the dog
and form a “q” with the slip lead.
Remember that the pup’s head and spine must be pointed in a straight line toward the dummy before the release command is given. By having their head and spine pointed in the direction of the dummy we are training the dog to go in that direction when released. During future training sessions this will pay dividends while training the pup to take a line on blind retrieves.
What is Next?
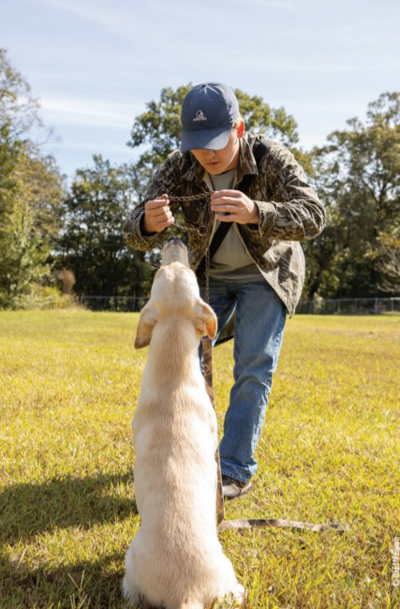
After completing this phase of training, the pup should no longer attempt to break on any hand movement or arm motion while in the heeling position. Now it is time to take it a step further - we heel our pup out into a mowed area and command the dog to “sit.” Command them to “watch” and throw a dummy to your right, or to your left, or to the pup’s rear. (This is what we refer to as a “baseball drill.” Imagine throwing a training dummy on first base, second base, and third base while your dog sits on the pitcher’s mound. The handler is standing on home plate.)
Next, we walk backwards about ten to twenty yards from our pup (to home plate) while holding our right hand in the classic “traffic director” stop position. Once at the desired distance, we wave both arms in different directions for a few seconds. After waving our arms, we extend an arm in the direction of the intended cast, hold it for a few seconds, and then depending on the direction to the dummy, give an “over” or “back” command. The dog should immediately respond to the verbal command, retrieve the dummy and deliver to hand. If the pup bolts or breaks when you begin waiving your arms, the process of correction is basically parallel to the actions took to correct the same issue at the heel position. We continue these drills until the pup is absolutely steady to arm movement and remains so until we give the appropriate verbal release command.
As you progress, continuously increase the distance between you and the dog. Also vary the distance of the retrieve. By increasing the distance between us and the dog we are reinforcing their steadiness when taking hand signals at longer distances. By varying the length of the retrieve, we avoid another training pitfall often referred to as a “threshold.”
On a different note, a threshold is easily created by giving the pup retrieves at the same distance repeatedly. For example, the handler can only throw a dummy a certain distance. Let’s say we are only capable of throwing a dummy 40 yards. If we repeatedly throw marks at 40 yards, the pup will become conditioned to running 40 yards and no further to look for the retrieve. By varying the distance of retrieves during training sessions, you should avoid this common pitfall all together.
If at any time, the pup breaks on the precursor arm movements, walk out to the pup, put his lead on, lift his front legs off the ground by the scruff of his cheeks and return pup as close to the original spot as possible. With pup sitting, walk out and pick the dummy(s) up. Then, reset and retry.
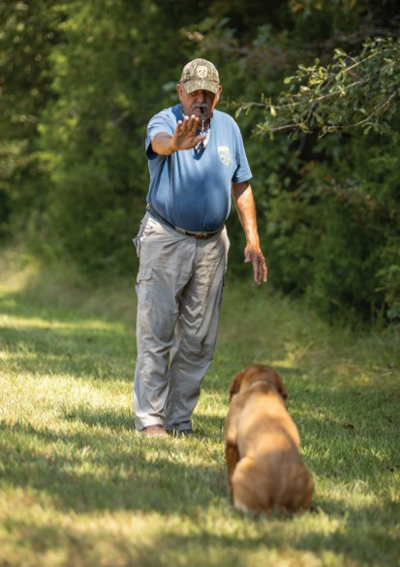
it’s time to take it a step further. Sit your dog, back up ten to
twenty yards and command them to “watch.” Throw a
dummy while holding our right hand in the classic “traffic
director” stop position. You want your dog steady until you
give the appropriate verbal release command.
Consider this - why wouldn’t we attempt to correct this unwanted movement by stopping the pup with the whistle followed by another attempt? Because the in the pup’s mind, the correction is being made for stopping on the whistle and not for the unwanted movement. They believe they are being corrected for the very last thing that happened. If the pup continues to bolt/break on the first movement of your arm during this phase of training, go back to the first stage we discussed. Once the desired results are obtained from the first stage (steady to hand and arm movement at heel), move forward to the baseball drill again.
Repeat these phases of training until you are fully confident that the pup will no longer break one hand/arm movement.
Conclusion
In conclusion, absolute steadiness is one of the most important characteristics a hunting dog should possess. This is an attribute that a handler should concentrate on from the very first training session, to the most recent session. While training progresses, it is common for a pup to display unwanted movement. Unwanted movement sheds light on handler errors during previous basic obedience stages of training. Luckily, this undesired behavior is relatively easy to correct.
Consistency and repetitiveness are two of the most important aspects that we (the trainer) can control while training our hunting dogs. We should be consistent and repetitive in each and every training session. Also, it is key to remember that we must remain cool, calm and collective while training. Even when the dog is consistently failing, we must keep our emotions in check. Otherwise, they will sense our frustration and we will work against ourselves. If you become frustrated; QUIT and restart from the very beginning.