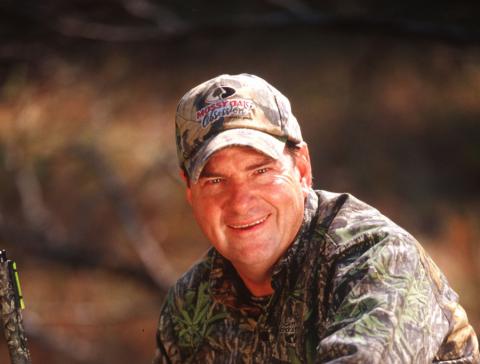
Tracy Schmidt | Originally published in GameKeepers: Farming for Wildlife Magazine. To subscribe, click here.
Health foods are all the rage these days, and none comes healthier than the pure-protein provided by white-tailed deer venison. Venison is low in fat, high in nutrients and packed with a whopping 44 grams of protein in one man-sized serving (six ounces). That’s more than half the daily recommended amount of protein for a healthy person.
Although pure, clean venison is the poster food for good health, it does come with some precautions. As with any meat, special care must be taken after your deer is down; during the butchering process; and, of course, in the kitchen. I’ll share my family’s best practices here.
A Few Words on CWD
No discussion on venison can occur in these modern times without first addressing the "Boone-and-Crockett class elephant" in the room: chronic wasting disease. CWD became a hot-button topic among Eastern deer hunters 14 years ago when the disease was discovered in free-ranging deer east of the Mississippi for the first time. It had been previously considered a Western deer disease (and elk and moose) confined to states like Wyoming and Colorado (where it was first identified in 1967).
The disease (transmissible spongiform encephalopathy - TSE) centers on abnormal brain proteins in deer which, when infected, always kill the animal. Human concern heightened when some scientists characterized the disease in the same category as Bovine spongiform encephalopathy (BSE) in cattle (Mad Cow disease) and Creutzfeldt-Jakob disease (CJD) in humans.
Although BSE has been linked to increases in CJD, there are no known links between CWD and any increased cases of TSEs in humans. In fact, several scientific studies have concluded that there is most likely a species barrier between CWD in deer and TSEs in humans.
is much a decision of personal
preference. Some prefer head-down
because they believe it allows heat to
escape more quickly from the larger cuts.
Should we worry about CWD in our venison? If you hunt in an area with known CWD infection rates, common sense only dictates that you would want to have your deer tested, which is fairly simple and cost effective. More importantly, you should follow some basic handling precautions after your deer is down:
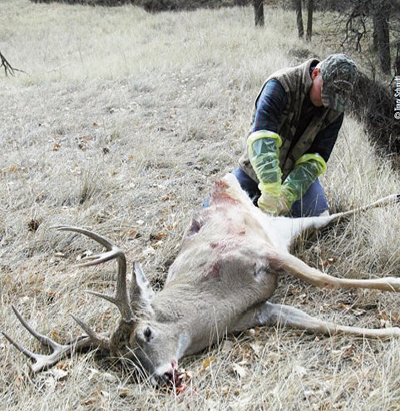
1. Field-Dressing Know-How
There are two important parts of the field dressing process: keeping the deer from becoming contaminated from its own waste and keeping external contaminants from entering the body cavity of the deer while you are working with it. Make sure to use a sharp, clean blade and to wear elbow length gloves when field dressing your deer.
Just behind the breast bone, make an opening through the skin and muscles of the upper abdomen. Insert two fingers of your gloved hand into the body cavity and keep the knife up and slice the skin apart down to and around the anus, making sure not to puncture the stomach and intestines.
Contamination from contact with digestive tract contents not only will taste bad, but it can be contaminated with bacteria which can cause food-borne illness at the point of consumption if the meat is not properly handled or prepared. Remove the genitals of a male deer and discard them. Cut around the anus and tie it off then draw the intestine back through the canal between the rounds, into the body cavity and out and remove through the body cavity. Be mindful about keeping your knife clean while you work. Keep all removed internal organs from introducing contamination to the meat. Try to avoid contact with the brain, spinal cord, spleen and lymph nodes while field dressing your deer. Make sure you remove all the internal organs.
Roll the deer over to drain any excess blood before you drag it, but be careful what you roll it over onto. If you are removing the head, use a separate knife for that than you used for working with meat areas. This will help you avoid cross-contamination. Another thing to avoid is getting dirt and debris from the ground into your deer and a personal dislike of mine, hair.
When you are done working, clean your knives and equipment with a 50/50 solution of chlorine bleach and water. Soak your knife for an hour to make sure it is sterile.
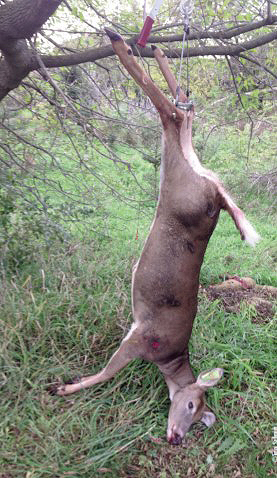
2. Cool Your Deer
Hang your deer and prop open the body cavity with a stick. My husband and I believe that using a head-down position is better because it allows heat to rise from the chest cavity more quickly. Some old-timers have chastised us for doing so, claiming that blood will pool up in the upper thorax. We ignore such criticism because the majority of the prime venison comes from the hind quarters. The few scrap-pounds of venison that could potentially be spoiled in the neck/shoulder area is a risk were willing to take if given the choice, but you know what? We’ve never lost an ounce of meat by hanging our deer from the hind legs.
During the early archery season, we also pack our deer with bags of ice to help cool it down. To hang a deer head down, simply insert a stout stick or meat-hanging gambrel between the hock and the tendons. Make sure to skin the hock before you hang the deer if you are going to do so yourself. It is very easy to accidentally cut the tendon when making the first cuts around the hock. Doing so would cause the deer to fall down.
A shady spot where temperatures stay at or below forty to fifty degrees is best for storing for two to three days. If it is cooler than your refrigerator, your deer may hang for a bit longer. Hanging the deer in a walk-in cooler is ideal, but you may quarter the deer and put it into a chest freezer.
when gutting a deer. It will help avoid contamination from
clothing and also protect your clothing from fluids in the
deer.
Thawing and refreezing fresh meat once will not affect meat quality. If you are taking your meat to a professional processor you are ready to load your deer and go. Just make sure not to tie the deer to your vehicle’s hood since the engine heat will hasten spoilage. Some will pull the carcass in a trailer or in a pick-up bed without covering the meat. This just serves to introduce road-grit to your meat.
3. Choose the Right Processor
When we don’t have time to cut up our own deer we take them to a professional butcher. We are lucky to have a local grocery store that processes deer. We know that the deer are kept in a walk-in cooler and that we will be getting our own deer back to eat. We like that it is processed in a commercial kitchen with its clean equipment and health inspections.
It is important to get your own deer back when you try to be so careful while field dressing. Not everyone is as careful, so if you don’t know that you’re getting your own venison back you are taking some big chances. Make sure to ask about that before you drop off your deer.
We are also very selective of when we take our deer to the processor. We usually drive the deer to the processor during non-peak hours like weekday mornings. This allows us to personally drag the deer into the cooler and talk one-on-one with the butcher. It’s just like anything else: If you get to know the person, they’re more likely to look out for you the next time you show up.
When you don’t have time to do your own butchering, look for a professional setup. You want a butcher who will make sure you get your own venison back.
When you go to a butcher shop, look for cleanliness in the work area. Tables should be stainless and the floor should be clean. Look for working sinks and clean equipment. Talk to the people who work in the butchering area if you are able to have access to them to find out how long they have been processing deer. Don’t be afraid to walk away. After all, this is the food you’ll be serving to your family. If you’re going to pay to have your deer butchered, it only makes sense to find the very best butcher in your local area.
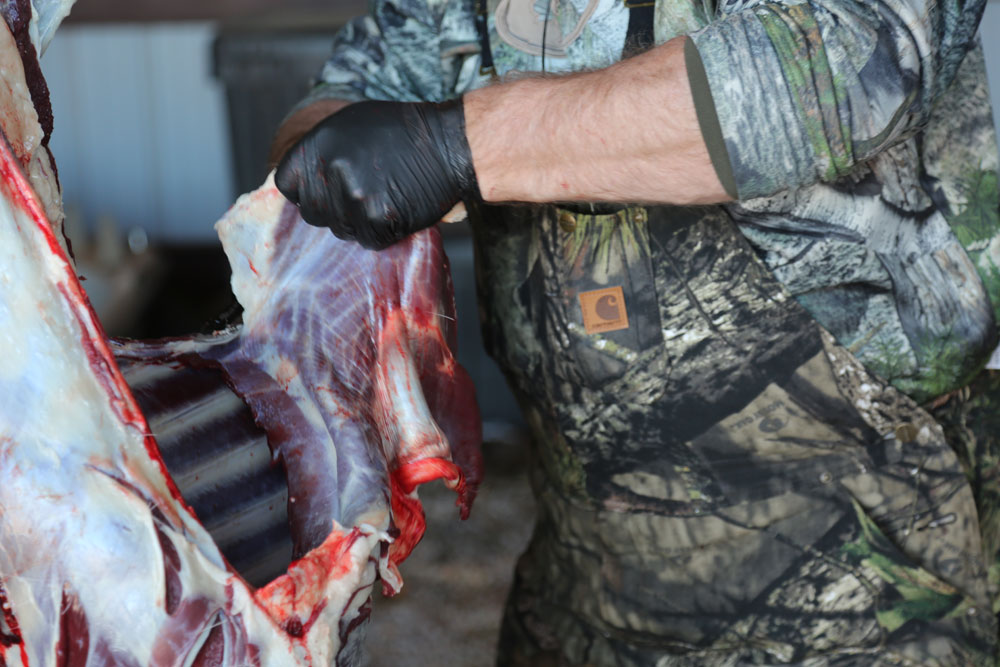
4. Skinning Techniques
During clear, cold weather, you can let your deer hang for several days on the meat pole or from a tree limb. Just be sure to hang it high and keep the chest cavity protected from the elements (and critters). During warmer weather, you’ll want to get the skin off as quickly as possible to assist with the meat-cooling process. Deer can be skinned while hanging head up or head down. There are plenty of quality videos online that show proper techniques. We prefer the head-down (back feet first) method because it allows for the hide to come off cleaner and more quickly.
With a razor-sharp skinning knife, start by cutting circles through the hair and hide just below the dew claws on the back legs. Next, make incisions along the inside of each back leg, running them through the hide along the leg bone all the way to the deer’s anus. Peel back the hide on each legs and pull the hide down (almost like removing a stocking) until both sides are skinned all the way down to the deer’s rump.
From there, work the knife around the tail to free up the hide from the hind quarters. This will now allow you to pull the hide down the deer’s stomach and thoracic cavities in one motion (when the deer is still warm). It’s almost as easy as pulling off a sweatshirt if you’re working on a freshly killed deer. If the deer is cold and stiff, you’ll need to use your knife a bit to help loosen the tallow from the hide.
Keep working your knife and pulling the hide until you get all the way past the front shoulders and past the deer’s neck. Don’t stop short. Pull the hide all the way to the head if you can. A lot of people make the mistake of stopping short once they get past the front shoulders. Don’t do that, because there’s plenty of good grinding venison in the deer’s neck.
5: Butchering Tips
I admittedly was intimidated when I helped my husband butcher a deer for the first time. It’s certainly something I wasn’t exposed to while growing up in Natick, Massachusetts. But after those first few deer, I soon learned to enthusiastically embrace the job because this is where we ensure our final food product. The quality of the meat is totally dependent upon what we do during the butchering process.
Making meat from a carcass is really quite simple. Just break it down into working-sized pieces and then take your time processing it from there. For example, we start by reducing the deer to seven main pieces: two hindquarters, two back-straps, two shoulders and the neck. True, there can be meat in the ribs but this section of the deer is best utilized when you a) are working on a large buck, and b) the deer was in pristine shape when you field-dressed it. Translation: Don’t mess around with the ribs if there’s any chance stomach contents leaked out during the field-dressing process. It’s just not worth the health risks of possible cross-contamination.
The back-straps are easy to remove. Just fillet them off the backbone of the deer as you would fillet a fish. Use the knife to feel your way around the spine. Once you have worked the knife halfway down the back-strap, you can oftentimes pull it the rest of the way. You’ll get two forearm-sized “logs” of meat from the back-strap of an adult deer.
For the hindquarters, you needn’t use anything but a stout, sharp knife. No bone- saws are necessary. Just use your knife to separate the muscle groups. It’s easy if you take your time. You’ll end up with three nice muscle groups plus a few handfuls of shank meat. Use that for stew or stir fry. The bigger chunks can be divided into roasts or sliced (always against the grain) into steaks.
Front shoulder and neck meat is almost always used for venison stew, chili and grinding meat in our home. When given the time, I’ll tie a shoulder roast or two for the freezer. These are ideal for weekend dinners in late winter. (Shoulder roasts need to be slow-cooked on low heat.)
Conclusion
Field-dressing, skinning and butchering a deer for the first time is about as intimidating as changing your car’s oil for the first time. However, once you get over those irrational fears, you’ll wonder why it took you so long to roll up your sleeves, because there’s nothing more satisfying than providing your family with an entire dinner plate of food you’ve grown, hunted and prepared all by yourself. Venison provides that satisfaction…in spades.