Bob Humphrey | Originally published in GameKeepers: Farming for Wildlife Magazine. To subscribe, click here.
We hunt for many reasons, not the least of which is food, like venison. It’s 100 percent pure, all-natural organic protein. It can be pretty darned tasty too. However, just how palatable it is often depends as much on how it’s handled in the field as in the kitchen. And the process begins before your ground venison ever hits the ground.
Shot Placement
not the least of which is shot placement. Unless you see
the animal fall, wait at least 30 minutes. Then, track the first
100 yards. If you don't find it, you may want to wait longer.
I don’t know exactly how much a pound of venison is worth. But I do know an ounce of prevention is worth a pound of cure, and I’m not talking about the “cure” you put in your venison jerky. The goal of every ethical hunter is a quick, clean kill, which is brought about by an accurate shot. There are both selfish and unselfish reasons for a quick kill, but principle among the former is that it improves the quality and palatability of the final product.
The more stress a mortally wounded animal experiences, the more adrenaline and other chemicals are released into the bloodstream and ultimately the muscle fibers, influencing both the flavor and consistency of the meat. A well placed shot also allows you to retrieve your game to get on to the next step more quickly.
The worst case scenario is probably a paunch or “gut-shot.” Digestive fluids and materials leak directly into the body cavity tainting any meat they come in contact with. It's also very stressful on the animal, and you'll likely have to leave it in the field for an extended period of time, both of which negatively affect meat quality. However, not all is lost. Even a gut-shot deer left overnight can still be salvaged if you follow the next steps properly.
Dressing
The next and possibly the single most important step influencing quality of the final product is dressing or gutting the animal, and this includes both when and how you do it.
It's customary in some places to haul a deer out of the woods "round" and eviscerate it in the skinning shed. I never understood the logic of dragging an extra 60 pounds or so of waste out with you. You’ll just have to haul it back out and dump it somewhere; and leaving it right where the deer dropped does absolutely no harm to the kill site (I’ve killed more than one deer over a fresh gut pile). More importantly, the sooner you open up the body cavity and empty its contents, the better your venison will be, and every second counts. Your biggest enemies are bacteria, which thrive in a moist, warm environment.
When an animal expires the digestion process slows, but does not stop. Bacteria in the gut continue breaking down food, which the digestive system can no longer process, so fluids and gasses escape into the body cavity. Furthermore, blood may be pooled inside and the longer it stays in contact with meat, the more spoilage and waste you'll have.
In the Field
out of the woods and the chance for meat spoilage but
customs vary around the country and some hunters prefer
to gut their deer back at camp.
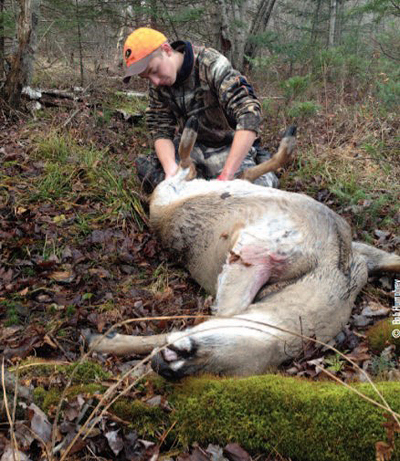
To begin field dressing, lay the deer on its back. On sloped ground you will find it advantageous to face the deer's head uphill. It's also helpful if you can have someone hold the rear legs apart. Then follow these steps:
- Cut only the skin all the way around the anus or vent, being careful not to cut into the colon. Make your cut deep enough into the pelvic canal to cut away any tissue connecting the vent to the canal.
- Cut only the skin around the genitals (buck) or udder (doe), cutting back toward the vent as you pull them away from the body. Cut only as much as necessary. The more you cut, the more you expose to possible contamination.
- Tie a piece of cord or string around the rectum, cinch it tightly and knot it. You can now cut away the genitals or udders, above the knot, and discard them. The knotted cord will ensure that no urine or feces enter the body cavity when you pull the vent back through the body cavity.
- At the base of the brisket (breast bone), make a shallow incision through the skin and belly muscle, being extremely careful not to cut into the paunch (guts). Do this by lifting the skin and muscle up and away from the body while simultaneously inserting the knife - blade up. Beginning at the base of the brisket, cut down the middle of the belly to the vent. (Some folks prefer to start at the rear and cut forward. That’s your call). As you do this, it’s important that you avoid puncturing the paunch. Stomach contents can taint the meat, make a nasty mess and introduce you to an aroma you will never forget. This is best accomplished by first, positioning your knife with the blade facing upward, then inserting two fingers (one on each side of the blade in the shape of a "V") in the slit. Use your two fingers guide the blade and to push the skin and muscle upward as you cut. This step is made much easier by using a knife with a gut-hook blade. If you don't intend to mount the deer, you can continue your cut up through the rib cage with a knife or saw, opening the rib cage to expose the chest. If you plan on mounting the deer, cut no further up the chest.
- Cut the diaphragm - the muscle membrane wall that separates the chest cavity from the abdomen - away from the rib cage.
- Reach up inside the chest as far as you can and carefully cut the windpipe and the throat. Then grasp the throat and windpipe and pull back and away from the deer, out of the chest.
- Roll the deer on its side and pull the entrails, heart, lungs and liver out in one complete mass. You may have to tug a little on the lower intestine, but if you have done a sufficient job removing connective tissue in the vent, it should come free. Some folks prefer to use a saw or axe to split the pelvic bone making it easier to remove the lower intestine and genitals. It's not necessary, and you'll have to cut through a considerable mass of good steaks to get at it, also exposing the meat to air and bacteria. But again, that’s your call.
If you plan to save the heart and liver, make sure they don't contact the ground. Separate them from the rest of the entrails and put them in a Ziploc bag for transport. Turn the deer over on its belly, raise the head and chest and drain any remaining blood from the body cavity.
In the Skinning Shed
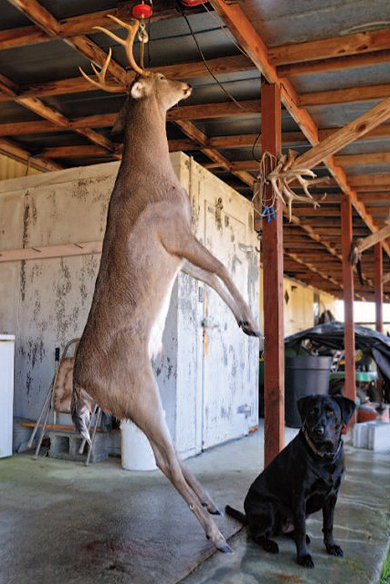
If you prefer to eviscerate your deer back at camp, you make roughly the same cuts, with a few minor variations. First, cut the anus before hanging. Next, hang the deer over a large bucket, vat or tarp. You will probably find it advantageous to hang the deer head-down. Hanging the deer head up makes it more difficult to open the body cavity without nicking the paunch, but once that's accomplished it's easier to empty the whole mass of entrails with the head up.
Cool It
to age your venison is optimum. Aging helps to break
down muscle tissue and add flavor to the meat. However,
the meat must be kept at the appropriate temperature and
oftentimes the “old oak limb” in the backyard may not be
the best place to “age” your meat.
The next, and the next most important step, is to cool the carcass. If you're transporting a field-dressed animal, prop open the body cavity to allow greater air circulation. A stick will work, but there are manufactured collapsible devices available as well. If it's really warm, you can stuff some ice in the cavity. In the skinning shed, rinse the deer with cold water and get it into the cooler. This task becomes a bit more difficult in the back country. Though it’s tempting, don’t rinse the carcass in a stream to clean and cool it as you’ll introduce it to all kinds of microscopic particles and potentially harmful bacteria. Next, hang it until you’re ready to transport. This allows air to circulate around it. If you’re remaining in the back country for any length of time in warm temperatures, you might consider skinning (more on that in a bit) and possibly even quartering your deer, moose or elk. If you have an ice chest or portable cooler, put the quarters in that. Just make sure to create some type of rack to keep the meat from direct contact with ice, and out of the water. If not, cover the carcass or quarters with a mesh game-bag. This allows air to circulate so moisture can evaporate, yet still cools the meat. It also keeps flies off and reduces the "bark" or layer of dried skin that forms on the surface of exposed meat, which you can peel or shave off later and discard.
Hang Time
Want to start an argument in deer camp? Bring up the topic of how long you should hang your deer. There is no single right answer but there are several that prevail in terms of logic. A Texas camp I once hunted used a technique they called “hot boning.” Guides brought the deer immediately from field to skinning shed, skinned and boned them without gutting and then put the meat directly into a freezer. It turned out to be pretty good eating, too. Still, conventional wisdom recommends aging venison. This allows beneficial bacteria to break down muscle fibers and also flavors and tenderizes the meat.
When aging beef the USDA recommends aging three days for every 100 pounds of carcass weight - under strictly controlled temperature conditions. But they have to say stuff like that. For venison, optimum conditions are above freezing but below 42 degrees. Then, duration depends largely on personal preference, but 5-7 days is not too long. The problem being is that it's difficult to regulate temperature on a carcass hanging off the old oak tree in the backyard. If you do have a cooler where you can hang it, properly aged venison can be compared to any prime beef steak…some even prefer it. Warmer temperatures will require you to shorten the aging process and temps below freezing do little to help.
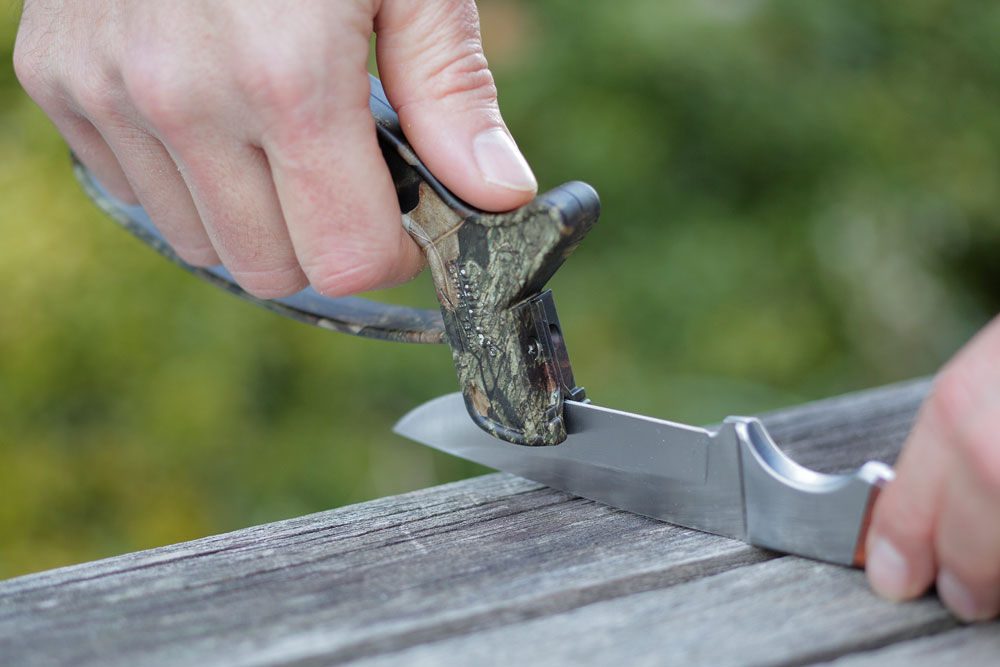
Skinning
Assuming you brought your deer home whole rather than in quarters, you'll have to skin it at some point. Just be warned, the sooner you skin it, the easier it will be. It's a fairly fast and easy process, made easier if you hang it head-down.
- Begin by ringing the legs - cutting the skin around the leg bones below the second joint.
- On each leg, make an incision from your ring cut, along the inside of the leg to the cut you made previously to open the body cavity when field dressing. This goes a lot faster if you use your gutting hook blade.
- Now simply peel the hide down toward the head. This part of the process is sometimes made easier if, as you pull, you also use a skinning blade to gently slice the connective tissue that helps the hide adhere to the body. You should also try to shave off fat and tallow. Your taxidermist might not appreciate it, but I recommend leaving as much fat and inedible tissue as possible attached to the skin rather than the carcass. This makes your processing faster and easier later on. If you're processing the deer strictly for the table, you're done with this step. If however, you plan to mount the head, the deer needs to be caped - a process I’ll save for a future article.
Cutting
When it comes to cutting up your deer there is no right or wrong way, but there are more sensible and efficient techniques. Rather than go into detail on specifics, I'd suggest you search online or pick up a video for step-by-step instructions. Basically, you are separating meat first from bone, fat and connective tissue (silver skin), and then into individual cuts. You want to remove all of the fat and as much connective tissue as possible. Game animals store their fat externally rather than in the muscle fibers, and it will detract from the flavor and quality of the meat. In addition, any sinew just makes it tougher and clogs up your meat grinder. As you begin, bear in mind that you want to pull or cut the bone out of the meat rather than pulling meat off the bone. This keeps muscles whole and intact. Once the meat is de-boned, simply separate it into individual cuts. I prefer to separate muscle groups into individual muscles (with a few exceptions) then segregate them into different categories listed below for different uses. This is where personal preference and experience/expertise come into play. Each part of the deer yields different cuts of meat. The tougher parts are better used for burgers, sausage or stew, while the more tender ones should be reserved for steaks and roasts.
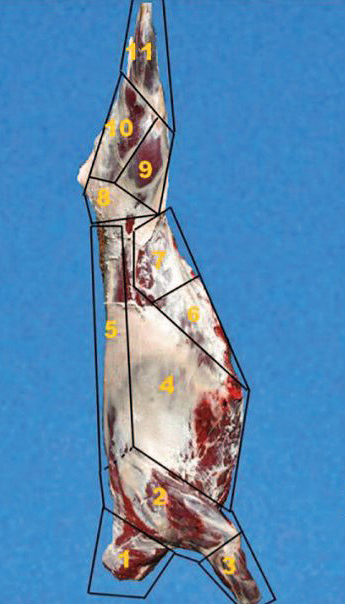 This figure shows roughly where each cut will come from.
- Neck - pot roast, stew, sausage or burger
- Upper Front Shoulder - shoulder roast, steak, burger or stew
- Lower Front Shoulder - burger or stew
- Ribs and Plate - ribs, burger, stew, sausage or jerky
- Backstrap (sirloin) - steaks, boneless or bone-in chops
- Short Plate - burger or stew
- Flank - burger or stew
- Top Sirloin - steak, roast
- Bottom Round - steak, roast
- Top Round - steak, roast
- Lower Hind Leg - burger or stew
- Tenderloin - steak Cuts
Steaks
Some folks make their venison steaks the same way as beef steaks, by cutting across the grain through larger, intact muscle groups. I prefer to separate out each muscle, as much as possible, then cutting across the grain to the thickness desired. If you're going to freeze some, you're better off leaving the muscle intact for now as it reduces the surface area exposure. Slice steaks up after thawing and just before you prepare them for cooking. You can double the size of a steak by making a butterfly cut. Slice almost all the way through, leaving a small remainder at the bottom of your cut. Then fold the partially sliced steak open.
Roasts
Each hind leg (rump) will yield three muscle groups suitable for either roasts or steaks. One, the top-round is a rounded mass of several smaller muscles. The second is a single muscle, roughly the same shape and size as the heart. The third is a rectangular shape with a pronounced grain to it. This is also my favorite cut for making barbecue. Slice across the grain to the desired length then slow cook it in barbecue sauce until the muscle fibers fall apart.
Miscellaneous
A couple side notes here: Front shoulder pieces are some of the most undervalued cuts on a deer. Many folks chop or grind them up but with a little extra carving you can recover some good steaks. Most folks cut out the back straps for sirloin steaks. If you want to be a little more creative, you can leave some bone in for chops or rib-eye steaks. The loose muscle below the ribs is good for flank steak. And of course, you can leave rib-racks intact, or filet them and use the meat for grinding.
Ground Meat
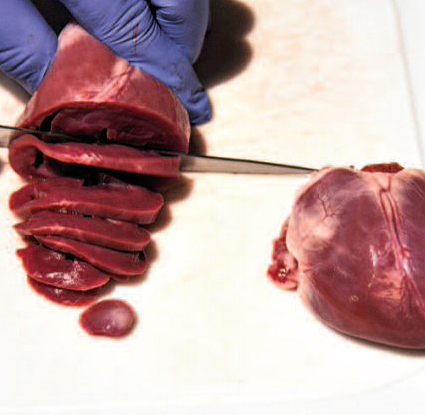
nutrient-dense foods you can eat. Just like the tenderloin is
often immediately extracted, prepared and eaten, some also
make a tradition of preparing some of the organ meat after the
kill.
Whatever is left over can be ground for burger, sausage, bologna, jerky and more. Here too, you have plenty of options. Some folks grind once, others twice. Many like to add beef, pork fat or even ground beef or pork to add fat and flavor. Obviously, you're going to need a grinder for this step. I used to use a hand-crank grinder…until I got a grinder attachment for my wife's mixer. There are numerous commercial grinders available with various attachments. If you're going to get serious about your processing, I strongly recommend getting one. Most grinders come with a plunger or pestle to push meat into your grinder. Throw it out. By now you should have gotten most but not all of the connective tissue out. Some of the remainder will be ground up with the meat, which is fine. Some will also collect in the grinder head. Clean the head periodically rather than trying to force meat through it. Once the meat is ground, there's almost no limit to what you can do with it – burgers, pizza, spaghetti, anywhere you use ground beef, you can use ground venison.
Freezing
When it comes to freezing, about the only variable is what you wrap the meat in. Conventional wax paper wrap is okay, but you will significantly increase the freezer life and quality of your meat by using a vacuum sealer. Make sure you mark packages with the date and cut of meat as well.