Chris Bridges
A lot of us invest great amounts of time and energy into improving wildlife habitat for ourselves, our friends and family members to hunt over. With all the expense that goes into selecting the best seed, ideal methods of site preparation and appropriate control of competing vegetation, I know that I have often been guilty of overlooking the need to adequately sample the soil of my site in order to fertilize appropriately. However, one of the things that I keep in mind is that if we want to grow wildlife crops that grow as well as row crops like corn and soybeans, then habitat managers should pay attention to soil sampling and fertilizing according to lab results.
Photography provided by Microgen
Why Should I Sample My Soil?
A lot of time folks are surprised when I suggest that soil sampling is an essential first step of habitat improvement projects. Obviously, the wildlife species that we are most interested in have been making it in the woods for a lot longer than we have been spreading fertilizer. However, if we can all agree that properly designed food plots and wildlife plantings can help to encourage deer to spend more time at a specific location, then we should also recognize that there are some things that we can do to improve the growth in our plantings.
I would suggest we take a few lessons from folks growing high quality row crops, forage or vegetables. Sure these crops can grow without adequate nutrition, but high performing plants benefit from proper fertilizer. Similarly, with the cost of fertilizer, it makes sense to only apply those nutrients that are going to help wildlife crops grow. Maybe your site has a long history of manure application and doesn’t need any more phosphorus. Perhaps you have a site that has a long term accumulation of potassium. If sample results suggest that you have plenty of these nutrients, then it would not be helpful to spend money on these nutrients. That might be money better spent on nitrogen, more seed, better competition control, etc. Without a soil sample, the best we can do is guess as to fertilizer needs.
How to Soil Sample
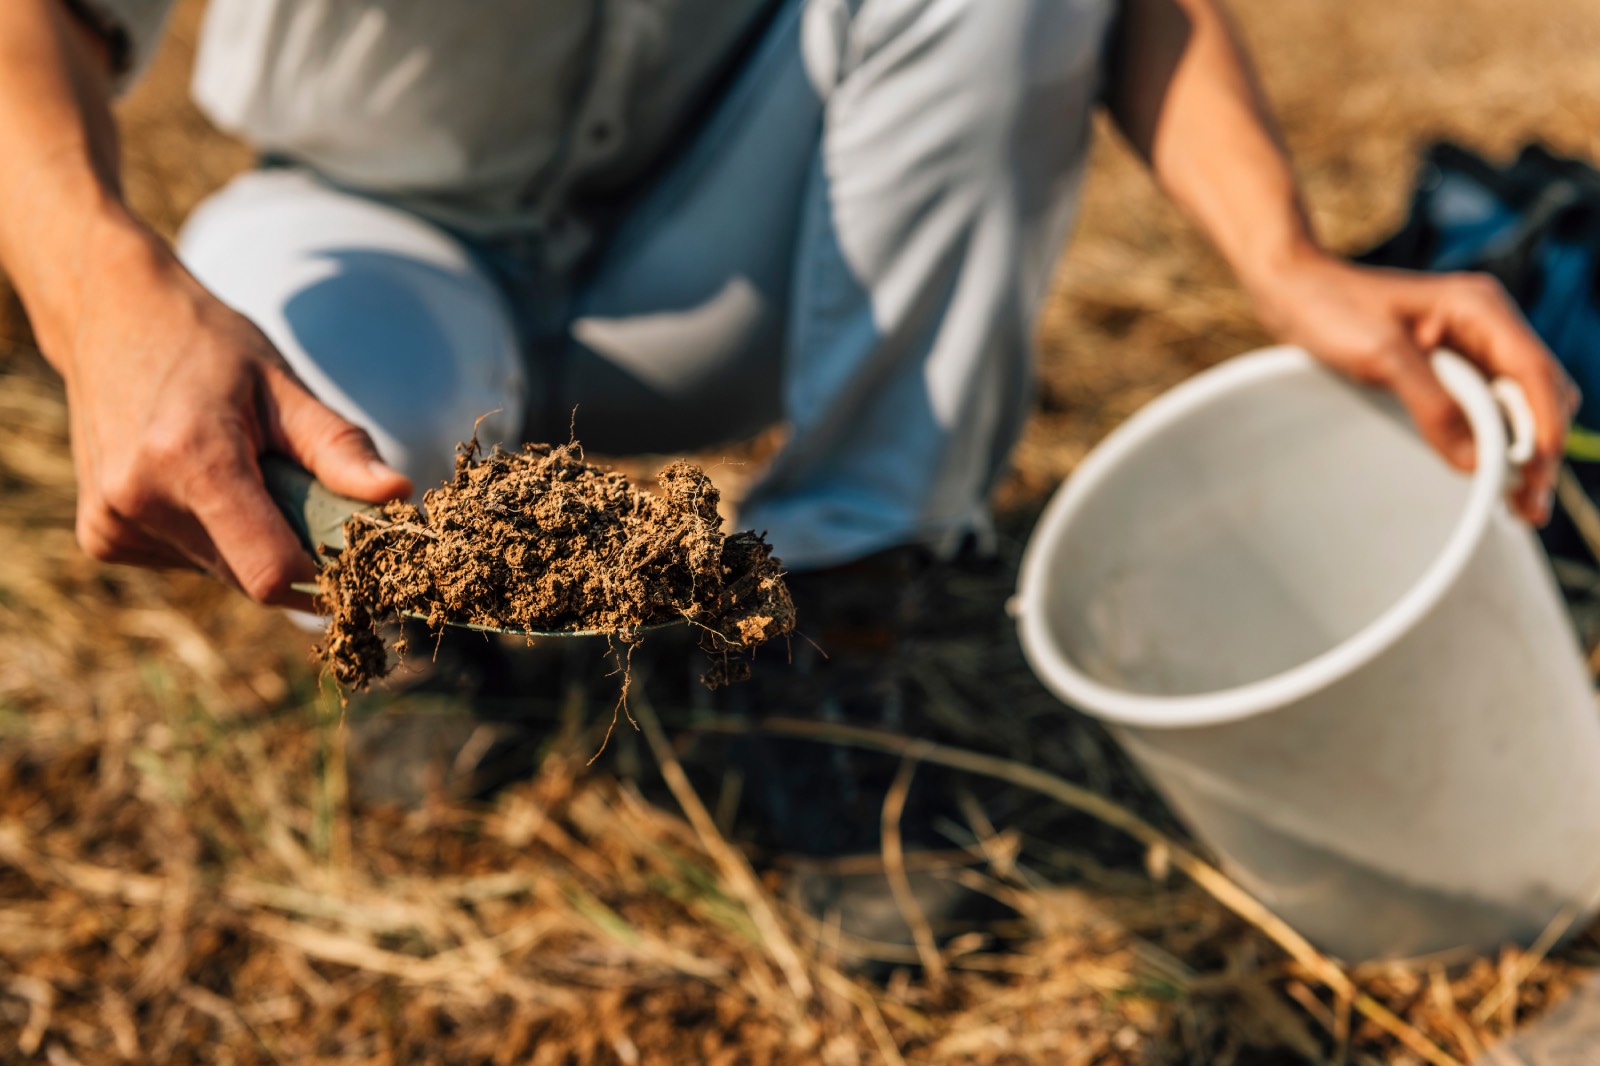
Photography provided by Jarrod Stephens
First off, before you sample, you need to make sure that you know where the sample is going. In past decades, most all soils samples for field, pastures or gardens were boxed up and provided to the local extension agent of the land-grant university cooperative extension system. While many states still offer this service to the public for a fee, there are many other options including private soil testing labs. Research your options and prices before sampling to know where to send the sample when collected. Mossy Oak's Biologic offers soil testing.
I have observed many well-intentioned folks pull soil soil samples that are not very representative of the site that they are looking to improve. First off, the sample result is only as good as the sample that is sent to the lab. If you send a poor sample just because it was easy to access, your soil chemistry report is not going to be very helpful.
Instead, you should focus on pulling a sample that is representative of the entire area that you are hoping to work with. This usually means pulling eight to twelve cores for every acre. Each of these cores are combined into one composite sample by mixing them in the bucket.
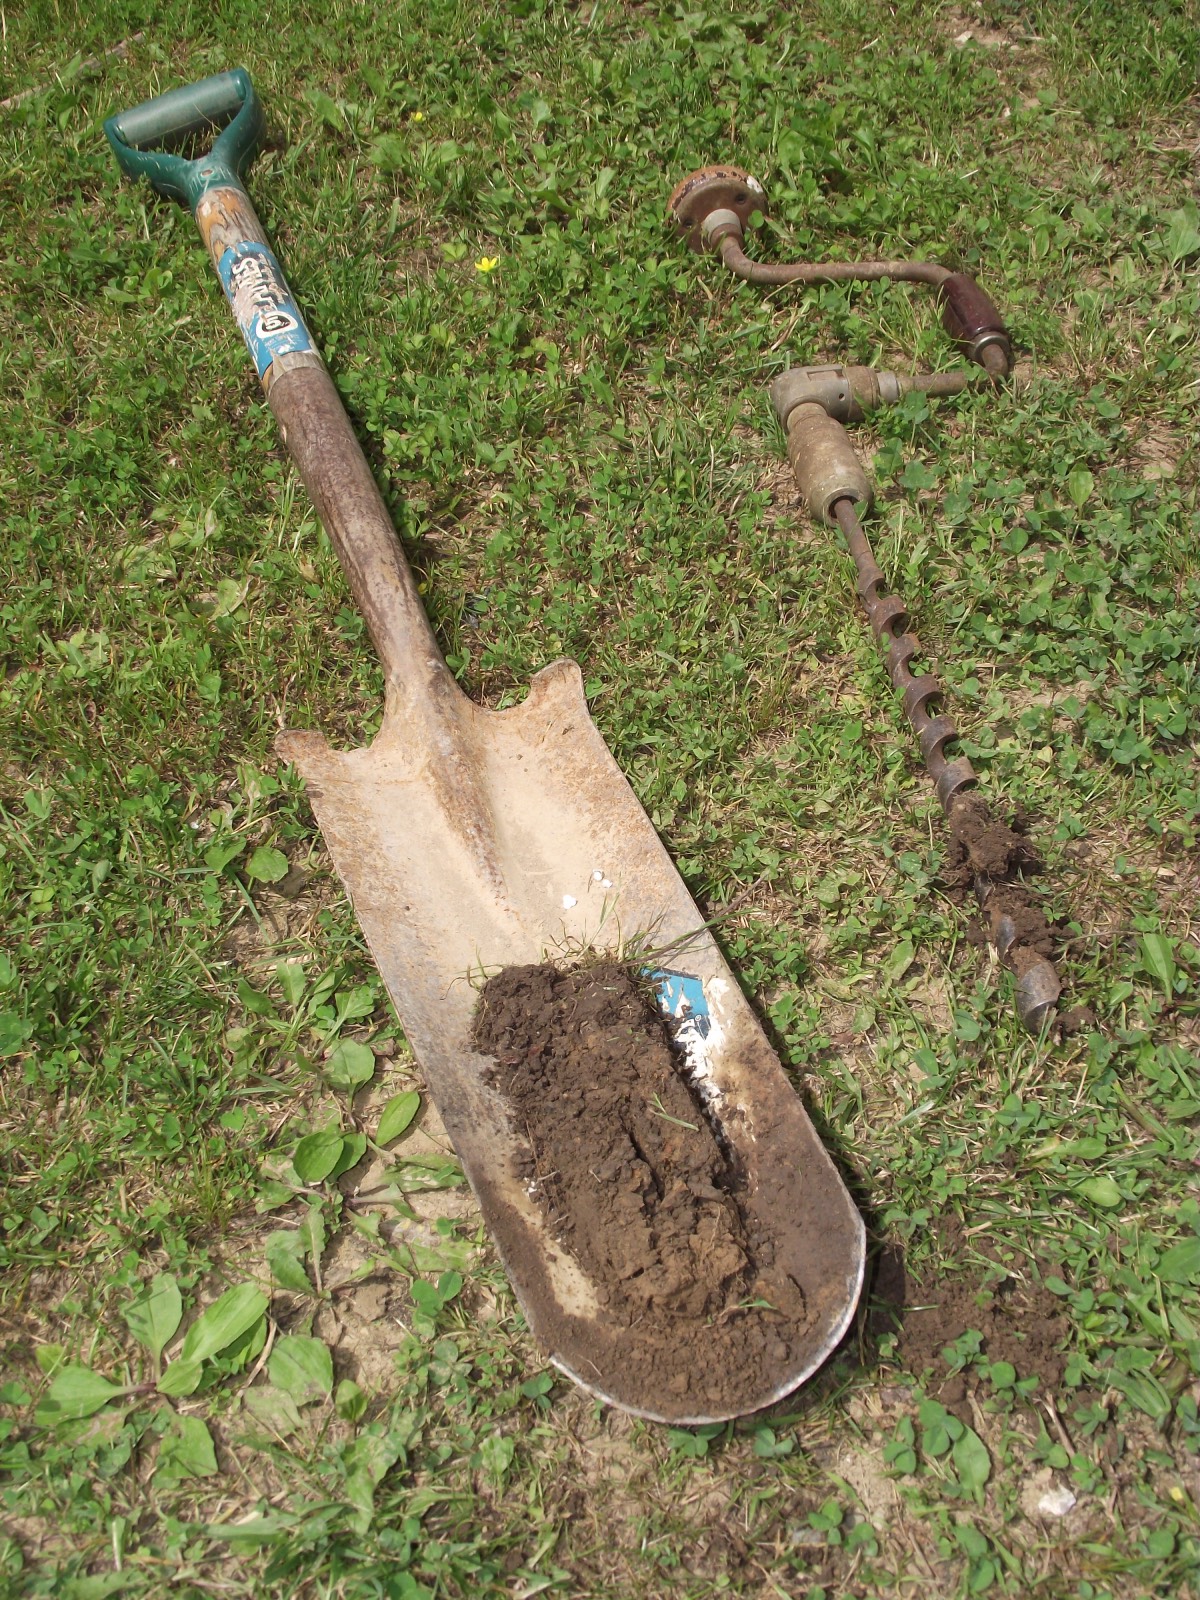
In addition to thinking about the total number of cores per sample, we should also pay attention to the proper depth from which our samples are being pulled. I know that it is easy to pull a large slice with a sharpshooter shovel, but maintaining a consistent depth is a challenge. Additionally, the depth of soil should be representative of the depth from which the plant roots will be extracting nutrients. For most food plot crops and wildlife plantings, samples taken from the top six inches are assumed to be representative of the nutrition available to the crop.
For this, a soil probe is often the simplest and quickest way to pull many samples that are at a consistent depth. When I use this tool, my students sometimes say that it looks like I pulled the handlebars off of my kid’s scooter. However, a good soil probe makes soil sampling faster and provide a more accurate sample. They are available online for purchase for folks planning a lot of sampling, or they can often be borrowed from soil conservation districts, agricultural cooperatives or extension offices for short-term projects. I usually put a piece of tape on the probe to make sure that all of my samples are taken from the desired depth.
You might want to sample different areas based upon land use history (row crops vs pasture), soil types (upland clay soils vs bottomland silt), forest type (mixed hardwood vs oak savannah), or management goals (deer plots vs dove fields). Keep in mind that you will only get one set of fertilizer recommendations per sample, so think about the type of equipment that you will be spreading with and your own ability to modify fertilizer applications between locations. Commercial fertilizer spreaders can sometimes adjust application rates more simply than if you are spreading with an ATV spreader, so plan your soil sampling accordingly.
How Do I Use the Sample Results?
Sample results are often provided within a few days to a couple of weeks after the lab received your samples. Most labs will provide you with either a paper copy of an electronic version of a report on your soil sample results. This will indicate pH and nutrient levels. While we may not be as familiar with the parts per million of potassium in your soil, the labs will most often translate this number into recommendations for spreading fertilizer in lbs per acre. In addition to nutrient levels, the sample report will indicate the pH of your site, which will provide insight into the acidity or alkalinity of your sample and perhaps more importantly the amount of lime required to adjust your pH to optimum levels for wildlife crop growth.
Maintaining records of soil samples, fertilizer and lime applications will allow you to track changes in soil chemistry over multiple years. Most professionals will recommend sampling every two to three years for annual food plots. Additionally, planning for long-term projects like warm season grass plantings or wildlife orchard establishment require accurate sampling to plan fertilizer application accordingly. Given the amount of time and resources that we invest in herbicide and seed for habitat projects, it only makes sense to soil test and fertilize accordingly to get the most successful results out of our wildlife plantings.
Send Your Soil to Biologic For Testing