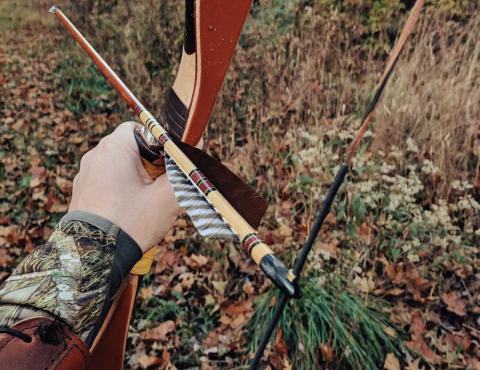
Dustin Trummer
If I had a dollar for every time someone chalked up my deer success to luck, I might finally be able to afford someone else to haul seed and gear up the ridge. The truth is, what looks like luck usually starts in May — with sweat, prep, and a few bags of the right seed.
The beauty of food plots is that anyone can plant one, almost anywhere. Whether you’ve got a wide-open field or a tucked-away tenth of an acre in the timber, a well-placed plot can become the difference between a “close call” and a punched tag.
This article walks through how I prep and plant throw-and-grow plots deep in the backwoods — where tractors can’t go and deer feel safest. And while there are plenty of seed blends out there, I’ve come to rely on Biologic’s Hot Spot No-Till blend for these kinds of setups. It’s made for hard-to-reach areas, minimal soil prep, and fast attraction — everything I need when I’m hunting off the beaten path.
Location Is Everything

As any real estate agent will tell you — location matters. And when it comes to backwoods food plots, not all spots are created equal.
These little hidey-hole plots only work when placed with intention. You need to accomplish a few key things to make them huntable and effective:
- Start with access.
If you can’t get to your plot without bumping deer, it’s already a bad investment. Your entry and exit routes should let you slip in undetected. - Match the location to your hunting timeline.
- Early season? Think transition zones — tucked between bedding and larger ag fields or mast sources.
- Rut? Focus on staging areas between known doe bedding pockets.
- Late season gun hunts? Press in closer to those thick buck bedding zones — especially where cover meets thermal advantage.
- Plan backward from the hunt.
Ask yourself: When do I want to hunt this plot? Then build your placement strategy around that timing. Don’t just clear a random opening and toss seed — the best throw-and-grow plots feel spontaneous to the deer, but they’re very intentional for the hunter.
Put the odds in your favor before you ever open a seed bag. When location and access align with your hunting goals, even a small backwoods plot can become your ace in the hole.
Choose Seeds That Are "You"-Proof

Now that you’ve got a solid location in mind, let’s talk seed. I’ve messed up more food plots than I can count — burned seed, planted too early, picked the wrong blend for the job. What I’ve learned is this: lean into seeds that are foolproof… or in my case, “Dustin-proof.”
I always look for blends that include rye, wheat, or oats, along with a mix of brassicas and clover. These seed types just flat-out work — especially in throw-and-grow situations:
- Cereal grains give you quick germination, browse resistance, and cold-season staying power.
- Brassicas (like radish and rape) thrive in cooler weather and kick into high gear after that first frost — often when deer need them most.
- Annual clover pops up fast, draws deer early, and may even rebound the following spring if conditions allow.
Blends that combine all of these are perfect for minimal-prep, remote-access food plots. You don’t need a tractor. You just need the right seed, a little grit, and a good plan.
Site Prep — a.k.a. Sweat Equity

This is where the real work happens — and where most hunters either earn their success or give up before it ever grows. For any food plot to thrive, you need sunlight hitting exposed soil. And when you’re planting in spots where equipment can’t go, that means sweat equity.
Step 1: Get Sunlight to the Soil
Canopy cover is your first battle. I like to target openings that run east to west — they get more sunlight than north-south aligned plots.
Great candidates for backwoods plots:
- Gas or power line right-of-ways
- Saddles and benches
- Old logging roads or skid trails
- Natural clearings
If the spot needs help, focus on clearing the south side to maximize sun exposure. I prefer to do this work in early spring, either by felling trees or girdling them to slowly open the canopy.
Step 2: Expose the Soil
Once sunlight is hitting the ground, it’s time to get it ready.
- In timbered areas: Rake or blow away leaf litter and thatch to expose bare soil.
- In open areas: Spray and mow existing vegetation.
My go-to tools:
- Backpack sprayer
- Weed eater with a brush blade
My spray schedule:
- Late May – Glyphosate + 2,4-D Amine
- Early July – Glyphosate
- Late July/Early August – Final round of glyphosate
Follow this with a full mow-down using the brush blade, and you’ve got a clean, open canvas.
Step 3: Rough Up the Dirt
Once the ground is cleared, take it a step further — rough up the soil.
You don’t need a disc or tiller. A simple steel rake gets the job done.
- Break up the top layer of soil to improve seed-to-soil contact
- Helps trap moisture, reduce runoff, and improve germination
If you’re already sweating, this last step might be the most important five minutes you spend.
Bonus Step: Don’t Skip the Soil Boost
Even in throw-and-grow setups, lime and fertilizer matter. Most blends — including Hot Spot — come with general guidelines on the bag, and you can follow those to start.
But if you really want to maximize your effort, get a basic soil test to dial in exactly what your ground needs.
Here’s a quick cheat sheet:
- Lime
- Ideal pH is 6.0–7.0
- No soil test? Add lime at 2000–2,500 lbs per acre
- Helps balance acidity and unlock nutrients
- Fertilizer
- Apply 13-13-13 or 19-19-19 at 200–400 lbs per acre
- For brassica-heavy blends, consider side-dressing with urea (46-0-0) 30 days after germination for a big boost
You already packed in the seed — might as well throw in a few bags of lime and fertilizer to make it all count.
Read more: Understanding Food Plot Fertilizers
Timing Is Everything
Now that your plot is cleared and prepped, when you plant matters just as much as how.
The biggest mistake I see? Planting too early. Guys toss seed in mid-July and wonder why it's fried by September. Instead, work backward from your area's first frost.
You want to plant 45–60 days before that date.
Here’s how I do it in Northeast Ohio:
- Average first frost: October 17
- Subtract 60 days → Target date: August 18
- Watch the forecast between Aug 18–Sept 2 for a solid rain window
- Plant right before a rain system rolls in
Bonus tip: If you’re detail-oriented, track soil temps too — you want them between 50–60°F for most fall blends.
Also: Skip spring planting in these locations. Spring plots work better in areas you can maintain. In low-access spots, spring plots often fail due to weeds and heat stress.
Instead, time your throw-and-grow for late summer into early fall, so it peaks when you need it most — during hunting season.
Don’t Blow the Opportunity
The stage is set. You’ve done the work — the clearing, the spraying, the seeding. Now comes the final step: don’t overhunt it.
You’ve spent months stacking the odds in your favor — don’t tip them back the other way.
If your plan is to save the plot for late gun season, then stay out of it until the conditions line up:
- A cold front rolls through
- Your target buck is showing daylight
- The wind is perfect
That’s your green light.
Hunt it too early or too often, and it becomes a danger zone, not a dinner bell. These kill plots work because they feel safe. Blow that, and it’s game over.
Be patient. Be disciplined. Trust the work. Because when the conditions are right, that little patch of green you sweated over all summer might just become the stage for your best season yet.