One of my fondest memories as a child was walking into my granny's kitchen with the fresh vegetables cooking on the stove and the meat dish in the oven with empty mason jars all over the counter of her little (and I mean little) kitchen. Next to her stove she stashed her orderly cans of the previous year's harvests. Boy, did she know how to garden, cook, and eat! I wanted to be just like her; warming the hearts of my children and guests with fresh, wholesome meals straight from the ground of my own backyard. That memory has propelled me in my quest to live the sustainable lifestyle and to capture all the toil of the years' harvests for my family.
Preserving food, whether by canning, freezing, or drying has always been a way of life. In today's fast-paced world, many people miss out on the beauty of growing, harvesting, and “preserving the year’s bounty” together with their families. With there being far fewer family farms these days, we need to find our way again. The good news is that preserving food is fun, simple, and in my opinion, necessary to the sustainability of my family's health, whether canning venison or garden veggies. I love knowing where my food comes from and that means I must control how it is harvested and preserved.
It is always such a busy time during the summer when everything needs to be harvested at the same time. I take measures to plant my seeds in spaced out intervals of a week at the time so that my kitchen is not overwhelmed when I begin canning the first of the harvest.
Once you have canned your harvest, you can supplement your winter garden harvest with summer vegetables and vice versa. Once you do this for a year, you will wonder why you never did it before!
Methods of Food Preservation
canning rack insert for stockpot, ladle, funnel, tongs (with
coated handles for lifting jars), glass canning jars, magnetic
lid lifter, lids (always use new lids), bands, saucepan for
sterilizing lids, and clean dish towels.
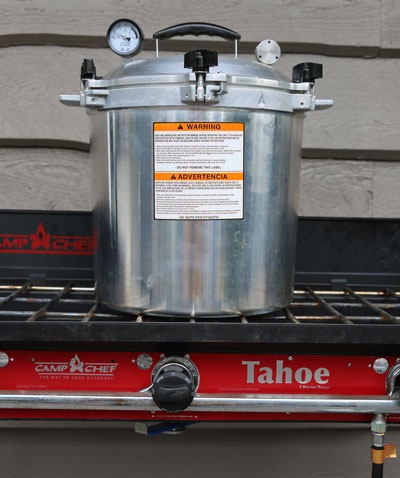
There are two main approaches to canning: the water-bath processing method and the pressure processing method. Preserving food boils down to destroying micro-organisms. The combination of acidity, heat, and an airtight seal is crucial to keeping bad micro-organisms from ruining your food. Botulism poisoning is avoided by either the high acidity or processing jars at high temperatures above the boiling point. That is where the pressure canner comes in. Most fruits and tomatoes may be processed using the boiling water method found below, but the United States Department of Agriculture recommends that the pressure canner method is the only safe method for canning low-acid foods such as vegetables, poultry and meats. If using the pressure canner method, always be sure to follow the instructions in your manual.
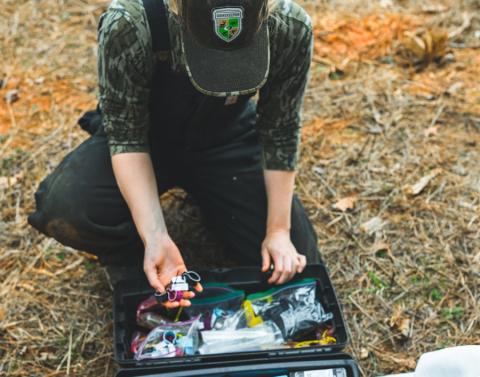
Supplies Needed for Canning
You will need supplies to can your food, but the cost is minimal compared to the savings of harvesting and preserving your own food. You will need a large stockpot, canning rack insert for stockpot, ladle, funnel, tongs (with coated handles) for lifting jars, glass canning jars, magnetic lid lifter, lids (always use new lids), bands, saucepan for sterilizing lids, and clean dish towels. These supplies can be bought at your local supermarket or hardware store as a 9- or 12-piece canning kit. If you plan on canning low acid foods, you will need a pressure canner as well.
Method 1: Water-Bath Method
If using the water-bath method, always make sure that the pH of your recipe is 4.5 or lower. If it is higher than 4.5, you will need to add more acid or use the pressure canner method. Both methods will be the same up until you place the jars into the canner.
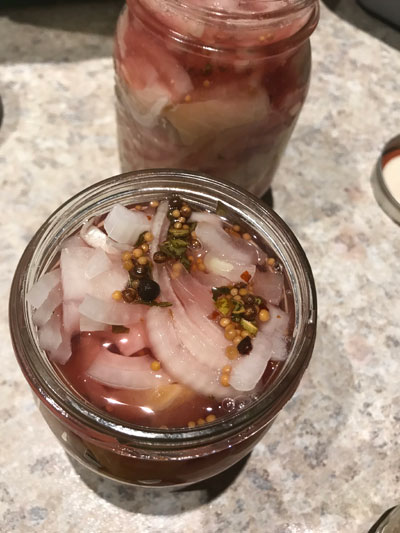
- Step 1: You will need to sterilize your jars, bands, and lids. (Always use new lids so that your lids will seal properly to your glass jars). Place the glass jars in a large stockpot covering the jars with water. Bring the water to a boil and continue to boil for 10 minutes. Bring a small saucepan of water to a simmer and remove from heat. Drop the jar lids into the saucepan, cover the pan and let lids warm in the saucepan for at least 10 minutes. This not only sterilizes the lids, it prepares the rubber on the lids for a good seal.
- Step 2: Remove your jars with the tongs onto a clean dish towel and begin ladling your prepared recipe into the sterilized jars leaving 1/2 inch air space at the top for large cans and 1/4 inch headspace for small jars. Wipe the rims of filled jars, cover with sterilized lids (lifting them with the magnetic lid lifter), and screw on the bands. Note that the bands do not create the seal; therefore they do not have to be overly tight.
- Step 3: If using the water-bath method, place the lidded jars into the canning rack and lower into the canner. Cover the jars with water 2 to 3 inches over the top of the jars. Keep the water at that level and boiling until you have reached the specified processing time. Times will vary depending on sizes of jars and ingredients. Let the jars cool in the canner for a few minutes and then remove them to the clean towel and allow to cool for 12 to 24 hours.
Notes for Water-Bath Canning at Higher Elevations
Remember to increase processing times for higher elevations. All boiling times for water baths are for elevations at sea level to 1,000 feet.
- Altitudes of 1,000 — 3,000 feet, add 5 minutes to processing
- Altitudes of 3,001 — 6,000 feet, add 10 minutes to processing
- Altitudes of 6,001 — 8,000 feet, add 15 minutes to processing
- Altitudes of 8,001 — 10,000 feet, add 20 minutes to processing
Method 2: Pressure Canning Method
- Step 1: If using the pressure canning method, place 2 to 3 inches of water in the canner, then place the rack and jars inside, being careful not to allow the jars to touch each other or the sides of the canner, then snap the lid closed. Place the canner over your heat source and set the temperature relatively high until a steady flow of steam can be seen coming from the vent pipe. Allow steam to escape for 10 minutes.
- Step 2: Place the correct weight on the vent to pressurize the canner (the correct weight will be given in your canner instruction manual). Begin timing when the weight starts to wiggle or the gauge reads the correct pressure. Keep the heat as even as possible and when the time is up remove the canner from heat. Allow the pressure to return to zero and release the steam. Open the lid and direct the steam away from you.
- Step 3: Remove your jars and place them on a rack or kitchen towel and allow them to slowly cool. If the lids do not “pop” down or you notice that the middle of the lid gives under pressure, place these in your refrigerator and enjoy for a few months - these jars did not process properly. Label and date your fresh canned goods and enjoy summer in winter and winter in summer for the best of both worlds!
Method 3: Freezing
beauty of growing, harvesting, and preserving the year’s
bounty with their families. We need to find our way again
and pass down the traditions that made our country great,
especially one that is as fun, simple, and healthy for you as
preserving your harvest.
Although canning is a fantastic way of preserving your harvest, freezing is an easy and sometimes more sensible way to preserve certain foods from your harvest, especially that of fresh venison and other wild game. Fruits and vegetables are excellent frozen if used in stews, soups, pies, or sauces as well. For me, I find that peas and beans are best frozen rather than canned in that they do not get too mushy and they seem to have a more pure taste when consumed. The drawback to freezing is that all can be lost in a power outage if power is not restored quickly. It is best to preserve using a variety of methods not only for your taste buds, but during unforeseen emergency situations.
- Step 1: When freezing fresh vegetables, always clean them and check them carefully for dirt or other debris. When freezing fruit, I have found it best not to wash the fruit, but to brush any visible debris from the fruit instead. Washing the fruit tends to make it mushy upon thawing.
- Step 2: Once they are clean, the next step is “blanching.” Blanching consists of boiling the raw vegetables for 2-3 minutes and then stopping the blanching process by cooling. Cooling is accomplished by placing the vegetables immediately into cool to cold water. This completely stops the cooking process and the vegetables are then ready to be placed in freezer bags or containers and frozen until you are ready to enjoy them.
- Step 3: Take your harvest and freeze them individually on a cookie sheet. Once frozen, grab a freezer bag and fill it with your frozen fruit and place back into freezer. It is as easy as that!
Many of my friends love to can their meat as do I, but my favorite way of preserving meat is freezing it. Freezing meat is a must for those of you buying whole cows or those who hunt large big game animals. Meat can be canned and dried, but freezing saves room and allows for more options when cooking. After allowing freshly harvested meat such as poultry, wild game, or recently butchered beef to age, it should be wrapped it in airtight, moisture-proof containers or paper.
There are vacuum sealers which are excellent for freezing your meats and produce as well as freezer jars and plastic containers, but one of my favorites is freezer paper. It is cheap and easily accessible, and as far as I am concerned, does an excellent job in preserving meat. Make sure to wrap the meat with as little air as possible between the wrapping paper and the meat. Also, you will want to wrap the meat with the waxy side of the freezer paper next to the meat. I like to double-wrap the meat to ensure freshness and date the package immediately after packaging.
Enjoying Home-Grown Food Year-Round
Of course there are many other ways of preserving foods such as drying, curing, and smoking, but canning and freezing preserves the freshness and unaltered taste of the vegetables, fruits, and meats. Enjoy your harvest year-round!
For more of sustainable tips, recipes, and videos from Stacy Pilgreen-Harris, visit her website.